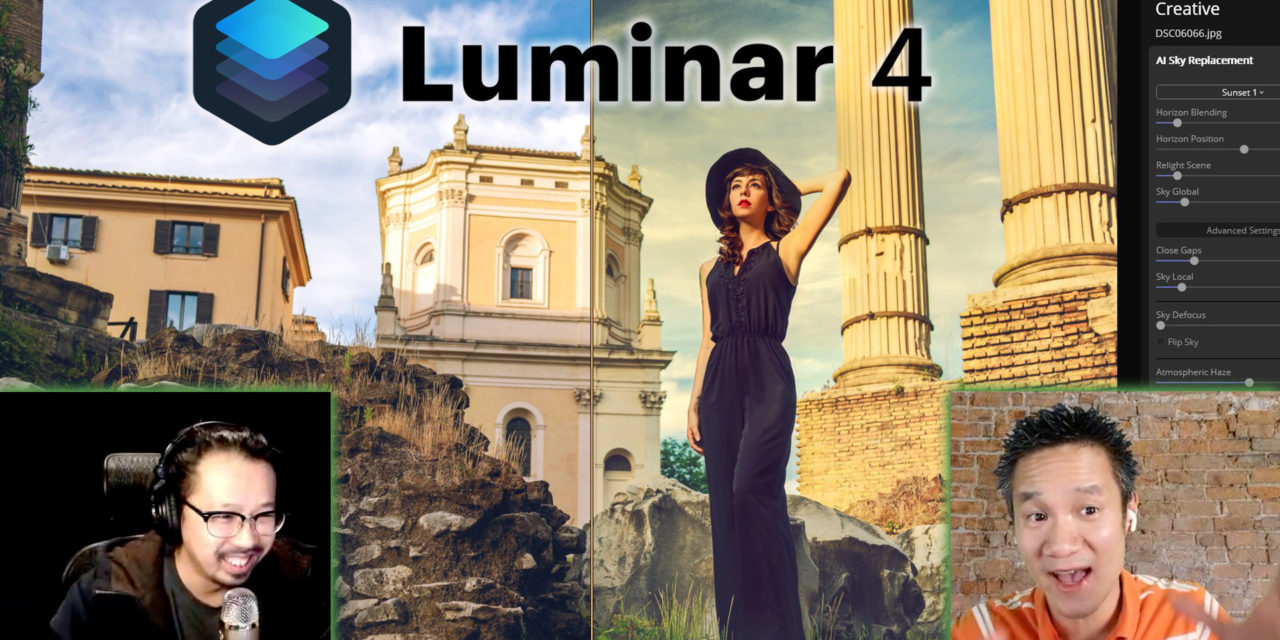

Going over the details of each slider in Luminar 4. We dig deep into the advanced tweaks you can do with Luminar 4! Featuring FujiFilm X Photographer, Jeremy Chan!
Save up to 35% off Luminar 4 @ https://PixelStabbers.com/Luminar + BONUS $10 OFF if you enter in coupon code “PixelStabbers” at checkout.
#Luminar4 #PhotoEditTutorial #PostProcessing
Where to Buy?
Luminar 4 Promo Code: “PixelStabbers”
Save up to 35% off Luminar 4 @ https://PixelStabbers.com/Luminar + BONUS $10 OFF if you enter in coupon code “PixelStabbers” at checkout.
Video Transcription
hey i think we’re live are we live check
check check audio check
i think we’re good we’re live hey guys
my name is david
this is jeremy this is uh you check me
out channel but today
we’re hosting pixar stabbers jeremy is
from pizza stabbers
and today we’re talking about luminar 4
which if you’ve been following our
channel
we talk about it a lot because i think
we think it’s a great piece of software
we both think we both love it and we’re
both professional photographer
i’ve been shooting weddings for over 10
years he’s been shooting weddings for
over 15 years now he also has a graphics
design background
so he does not only shoot pictures for
shoots beautiful pictures but he also
uses
photoshop and lightroom and luminar 4 to
really bring out the images and make it
a piece of art so that’s what jeremy
does he’s got a lot of experience in it
but we both what we have in common is we
use luminar 4
for professional and for casual use
because it’s such an amazing software
it’s a very affordable software right
jeremy it’s very it’s very fun to use
it just it makes work become fun yeah
it’s a very inexpensive it’s very fun
it’s easy to use
you don’t even need to have other where
it can be used as a standalone
meaning you just download the software
you run it and you can do everything you
need it’s basically your photo editor
but if you want you can use it within
your normal workflow if for example if
you’re using lightroom already
then you can use it as a plug-in to
lightroom or if you’re using photoshop
you can use it as a plug-in
for photoshop today’s demonstration is
beauty version tiles
yes very versatile um jeremy’s
presentation today he’s going to
actually use
lumina 4 for you and how are you going
to use that standalone or it’s a plug-in
today
uh i’m going to use it as a plug-in
plug-in to
photoshop from photoshop yes because
personally i’ve been using photoshop for
the past 50 years 15 years
um i never thought that i need enough
software to be honest i never purchased
any third party software for photoshop
until now because i usually
can do everything in photoshop but with
openers ai
abilities and it’s ai replacement for
the skies and everything it just makes
life much much easier yeah yeah
for sure and because because it’s a
plug-in it just works with your normal
workflow right because you’re using
photoshop
so everything that you’re familiar with
you just use photoshop for and when you
need the lumina effect
you pull in luminaire as a plug-in do
whatever you need and then you go
through and it goes back to photoshop as
a layer right
exactly exactly and luminar is so great
because it’s under 100 bucks guys the
link is right below
um use a coupon code pixel established
if that coupon code for
some reason doesn’t work go ahead and
send us an email at save money
at pixelestablish.com and we’ll help you
out anyway if you don’t know what lumina
demo
of what luminar 4 looks like so if you
go to luminar’s website
or skylim’s website is skydem.com you go
up here to luminar and you click on
product page
and you come to this page right here so
i’ll just replay the video so you can
see the video real quick
so give it a moment to load and jeremy
i’m sorry you won’t be able to see the
video but you’ve seen this video a ton
of times already right
oh i see it oh you can see it too cool
let me pull it up yeah i forgot you can
see it
so there it is so basically this is the
software and you can embed objects into
it the cool thing is they uh ai they
were talking about mass
things for you see right here you can
change the sky different dynamics guys
census guy nice guy
and you can do like a lot of portrait
effect you see how you’re just moving
sliders to change things
the cool thing is ai masks things for
you like you can have a lighting effect
and again ai
controls all the masking for you you
have all these looks and
all these different looks that you can
apply it’s very powerful
it knows what part is structure and what
part is sky and it adjusts accordingly
and it’s very smart you can even just
use like um an ai enhancement it does
everything for you so it’s so much that
you can do
it’s just one small piece of software
and it’s called lumina4
let me show you one more video um to
just highlight that
so today jeremy are you gonna do a demo
with
uh portraits or are you gonna do a demo
with like skies
and structure more i have different kind
of pictures
let me see how i feel like okay well
then let me just show
a couple of demos so as we scroll down
the website here
as we mentioned it can be used as a
standalone or plugin
as a standalone it’s basically a photo
editor and a browser
it supports full raw so whether you
shoot with in jpeg
or you’re shooting raw and raw has
different versions whether you’re a
nikon
a canon or a fujifilm you have different
raw format but don’t worry this supports
pretty much all the raw formats there
are
so again as a standalone it’s a photo
editor and browser or
you can use as a plugin to adobe
photoshop and apple products such as
apple’s aperture photoshop lightroom etc
so again you can embed new objects you
can bet
objects within a click uh so that’s
pretty cool here actually let’s just
let’s watch a real quick trailer how
that works here
it’s actually a pretty fun trailer it
did yeah
it is you gotta
create a whole new world in one click i
mean you just watch this
wait wait the sky the moon you put an
elephant in there
and here’s how ai works basically you
see it’s content where it detects the
sky part
and it detects everything in their frame
and it knows how to manipulate that
and it lets you put all this shape and
into your masked area it’s really
powerful i mean look at that it just
looks so cool
stuff like this will take you hours and
you can be as
creative as you want because now you
don’t have to spend all the grunt work
uh grunt time masking things it masks
everything for you
you can break you can make these
breathtaking images
in very short amount of time you got all
these sliders to work with and
um you know jeremy has told me in other
videos too
and i love the way he summarizes it
basically it takes the functionality of
lightroom
which is like a streamlined way of a
workflow like a browser
and it takes what’s what makes lightroom
so good is that it’s easy and simply
used with sliders
but it has all the power and features of
something more advanced like photoshop
so you have mask and you have control
over pixel level
optimization and so it falls right into
the middle right you get the power of
photoshop but user friendliness
of lightroom so it’s really exciting
exactly yeah
and i i’ve actually seen a lot of people
especially professionals they wonder oh
is it good enough to use
is it like a lightroom replacement or as
a pro is it even worth it
and what’s your answer to that jeremy
well it depends on the terminology on
that
it’s like well what are you using for
are you there’s two way
of using it it’s are you using for photo
editing
or are you using it for photo organizing
ah yes right yeah but
it’s in luminous four it has both it has
its own library it has its own catalogs
and folders so you can do your own
basically whatever lightroom can do in
in there for organizing photo
luminous four can do yes and as for
editing
it has so much more to offer than
lightroom
room can only fuss around with your um
exposures
white balance shadow highlight maybe
saturation
a little bit here and there that is
pretty much it this is all on the
surface of edit
lumina 4 actually can do pixel level
edit which is like even more in-depth
like adding stuff minusing stuff uh you
know
replacing sky adding new objects into
pictures you know
you could do all that in luminar yes and
it’s very easy too
so i would say definitely if you’re a
professional it’s great to have both so
you can have a variety
especially if you’re already using
lightroom as your normal workflow
don’t change your workflow because it’s
kind of hard to change workflow you can
still use lightroom the way you want
and when you’re ready to use some of the
lumina 4 features
you can actually pull it up as a plug-in
and start using it and if you
like yeah if you if you like luminar’s
browsing ability then you don’t need
lightroom at all so
there’s lots to do and like once you
feel more comfortable
i think luminar can actually place
lightroom for me as a wedding
photographer
but i can’t speak for everybody because
you know people use lightroom for
subtle different things so but
nonetheless
lumina 4 is so cheap that it’s worth it
just to try it and see how you will
adapt to your workflow
so here’s the sky replacement demo and
this is probably one of the most popular
features of lumina 4
and we can just watch the demo here
because essentially
it’s one thing that just people really
like and it just really dramatically
changes the way your photo looks
it replaces the sky very quickly because
it
uses ai and selects everything for you
like you don’t have to mask out all the
little areas behind the branches and
whatnot
but the cool thing is it has a real
light feature so
what that means is like when you replace
the sky not only does it just replace
the sky but it also
re-lights the rest of your scene so it’s
more believable in other words it blends
in with the sky
a lot more and later on germany will
demonstrate that right
here’s a hidden secret why um yeah
numenor force
replacing sky is so good
in the beginning numero works with a lot
of landscape photographers
now what you do if you go back to this
uh new york’s pictures right yeah to be
honest all this
landscape all this building they don’t
move
only the skies will change if you put a
camera there right
yeah so basically by just changing the
sky
and also with the relay feature that we
light whatever sky’s light onto the
buildings
you change the scene and that’s why you
can make any picture from normal to
dramatic
to any picture from you know just by
replacing the sky because
you don’t have to replace anything else
once you play the sky
yeah if you look at any picture out
there would look
uh dramatic and epic it’s always the sky
was epic and dramatic
that’s it’s never the building the
building never changed the trees never
changed
never changed that’s always the sky the
sky brings the lighting
yeah so what luminous 4 is it allow you
to change the sky and allow you to bring
in the lighting from the sky onto the
building and
in the foreground that’s the magic bit
exactly i’ve never actually heard it sum
up that well but you’re right it is the
sky
and you can see in this picture right
here we’re just changing the sky
and it makes the whole feel and look of
the picture
it tells the story it really does and
again you can see the building
colors reflect the sky to make it more
believable
and that’s all automatic when you
replace the sky in luminar 4.
it’s automatic because it does the the
initial
decision for you but if you want to
change it there’s these sliders that you
can fine tune it it’s really flexible at
the same time
so that’s what i love about it like you
can just open a picture
and click change sky and boom you’re
done but if you want to fine-tune it
there’s these bars
and even advanced options that you can
slide these little bars and it does
everything as you’ll see in the demo
that jeremy is gonna do later
and i guess one other thing that people
don’t realize how great this software is
is this ability to work with portraits
and it’s
actually a really powerful feature we’ll
watch this real quick trailer
and people don’t realize it but look how
amazing
its functionality is with portrait you
can basically with slider
change the way the skin looks remove
deflects all at the same time without
masking
you can enhance the way the eyes look
the color of the teeth
and then change the profiles of the eyes
whiten the teeth
slim the face enlarge the eyes improve
the eyebrows
remove dark circles add lip redness
all this stuff and again you’re just
sliding bars around you don’t need to
mask anything
hey i take care of everything for you
it’s so amazing
it’s like things like this i i always
dread and
have nightmares about when clients ask
me to do these little changes because
i can take a picture with great lighting
everything but then now i have to sit at
my computer and manipulate all this and
mask out things and change it
it just takes so much time so that’s
that’s actually one of the reasons why i
love this software so much because
all the ai is done for me so i just move
sliders and i have all this power
at the tip of my fingertip literally
well
to be honest for this newest version of
luminaire 4.2
what they bring on the table is the main
feature that everybody talks about even
we talked about is
the sky replacement obviously yes and
that is the portraiture we touch ai
yes um the reason that is there are so
many different genres of photography
right there’s wave topic there’s street
photography yeah
landscape headshots model shoots right
but ultimately we break it down yeah
this most of them
only require simple maybe adjustment on
exposure and
color grading yep it is landscape
photography who require a lot of
well either they they spend a lot of
time staying there doing long exposure
integrity
to create a dramatic look or they come
back they still have to trick the image
become epic
yeah and that’s why this a iowa sky
replacement held the landscape
photographer to create epic images yes
and then when it comes to portraiture
mostly headshot because they need that
picture for i don’t know like
whole five pictures or business card or
you know maybe
big they need to retouch skin and to be
honest if you
ever done it you know retouching skin
tones and defect it actually takes a lot
of time
so luminous four actually
focus on those two make sure that those
type of photographer
spend less time doing it so they can
spend the time
back to you know in their own life
creativity
have more time for your own life or use
that time to make your pictures even
better
right be more creative with the
flexibility instead of spending time
masking
and spending time doing the grunt work
and since you brought up um
the portraiture like let me just show
one more example of
how great the portrait enhancement is
like this
i love this demo because you can see
like real life like the stuff you would
need to do to fix a portrait
right so here’s an example of a portrait
right she might have like a
having a bad day but you can change this
with just
a simple ai slider just click on remove
yeah i didn’t want to say that word i
need to point out but yeah
it found them like that and it changes
them
here you’re enhancing the eyes removing
dark circles you can whiten the eyes
you can improve the eyebrows enlarge the
eyes even
and again everything is automatically
done you don’t need to spend time
masking
the ai knows what’s the eyes what’s the
eyebrow
what are the dark circles underneath the
eyes the lips the
pimples imperfection it knows all this
and it just makes the adjustments for
you
so it just really elevates your
photography so
these demos are great but i’m sure
you’re waiting for
us to show you a start to finish demo
right
am i right am i right i think most
people want to see how it actually works
well we got a visitor here and he just
wanted to come by and say hello
so hi ji zheng yu welcome to our live
stream
and if you have any questions feel free
to ask we’re going to do a demonstration
of how luminar 4 works and jeremy let me
know when you’re ready to share your
screen so i can pop up here
i am ready okay great so let me move
this up
just so that we are ready to share next
time and let me show you
jeremy’s screen there we go so now we’re
looking at jeremy’s screen
and uh okay let me close that little
window so i can see my phone
okay it’s got a picture here um so we’re
in photoshop right this is photoshop so
this is how like
how my waffle is like photoshop so
mainly i do like a command j
so that i have a duplicate layer of that
yeah so i don’t touch a background so
you know non-destructive i could always
go back
not lightroom only can never do that
they just can’t play with the word
non-destructive because there’s a lot of
different yeah menthol of the
instructive this is non-destructive of
course
another layer you can always delete the
layer and go back to the layer before
right
it’s just like yeah yeah so once
once you install aluminum four if you
open either lightroom
i mean lightroom basically you right
click on the picture and you can set
open or edit in
you know before if you have photoshop it
will say edit in
photoshop but now once you install that
it will say edit in
photoshop or edit in numerous four yep
so
for photoshop photoshop 2.4 is actually
light under filters
so it will actually scan software and
then lumina 4. so just click that
it open as a third party packet just
like that
so there’s number four this is the
version four point two
five five seven and speaking of version
uh luminar is great with updates too
because the price you you pay down below
is a one-time purchase you own the
software
and as uh time goes by lumira is gonna
update their software we’re at 4.2 now
i’m sure when you go to 4.3 4.4 4.5
whatever it is
as long as you’re in the major release
of luminaire 4 all the upgrades are
included as part of that one-time
purchase
and you can keep the software and use it
for as long as you need so just a plug
there for
why so great that luminar doesn’t do the
subscription model like a lot of
software companies do like photoshop for
example but you buy it one time
luminous four it’s yours to keep forever
so let’s go for the interface a little
bit okay so since i opened
the window four through um photoshop so
it’s a bit different
just slightly the big difference is you
can’t open the library
but if you open in a standalone it can
open
it has a library module that you could
go it will kind of
look through your whole heart right and
see where your picture is where folder
is so
it’s kind of just like yeah just like
folder and all that
and then if the main feature here you
can see is edit
and then there’s info info shows the
histogram of the pictures i mean
if you like the i don’t know it’s not
good not go to the in
the ins histogram freak that people
like look at it like see oh look at the
flag the black is not enough
right here though you know you want to
study that you can totally do that here
okay yeah
so you see what ah
oh you know where where all the wet
green blue is you can do that
and um so personally this is like a
finished picture it’d be a raw picture
here it shows all information here but
this is not wrong
so we go back to edit and
right here basically they make it so
simple you just have to know where
everything is so histogram still here
right still here yep here’s the black
point here’s the white point and stuff
you see how the picture changes
yep so when i click that that shows
that wet spot right here ah it shows
that it’s overexposed there has no
information it’ll just be white this is
a tad piece right yeah
yeah so but for a small piece like that
i don’t care you know yeah that’s
it that’s within the cloud right and if
you wanna place the sky in this way
anyway it’s all gonna be replaced
as well so it doesn’t really matter no
so uh if you click on
this little triangle on the left it
showcases the black point
uh it will show me whatever information
in the picture which is losing
information disappear black
in this case it doesn’t have it so it’s
fine so
this is if you want to be technical
about retouching this is something you
want to know like where’s the black
point
white point is all the information uh
balance series spread out
you know stuff like that um so it does
all that
and then it has layers which is
something that lightroom do not have
yes yes that’s that’s one of the
biggest disappointment when i’m working
with lightroom is like it doesn’t have
layers so
when you when you want to do some effect
it affects the whole picture or you can
have these kind of
batches of brushes but then you have to
manage all these little brushes it’s
just
crazy layers is such a simple comp
concept
that it doesn’t make sense why lightroom
doesn’t have it i guess it does make
sense because they want to make it
simple
the funny thing in here is that i’ve
actually have this is a layer inside my
photoshop
yes and i i in that layer i open it into
luminance four and then in here you can
also do your layers for example this is
the layer right you can duplicate it if
you want you know
but uh i don’t really see the point why
because it’s the same thing
so we could just do layer we don’t need
that but if you go to this plus size
here’s something different
you can add new adjustment layers
you can add new image layers and create
stem layers
now let me explain the new adjustment
layer meaning that
all all that layer does is apply
adjustment
onto the bottom layer which is this is
the bottom layers
okay okay only a adjustment adjustment
including
exposures colors uh white balance
you know color grading and such those
are those adjustments
only okay now if you want to let’s say
do a double exposure right you could or
apply
texture on it you can always add a new
image layer with this layer allow you to
put the image in it
right so it’s not just a adjustment you
actually put
new image new pixel onto the current
background
right and you could probably adjust the
opacity to blend it in
to your other layer yep so
and then create stamped layer can you
get what stem layer is
ah a stamp layer no i actually i don’t i
don’t know why it’s still layers
remember i show you at one point in
photoshop that if i push
ctrl shift of e i will able to create a
layer
emergency everything yes yep so what it
does is also create stamp layer that
what other adjustments you’ve done and
create a whole new layer on top of it
and so i could do even more
i love that feature yeah so like i said
it actually has everything photoshop has
and like and lightroom can’t do a jacket
of this
i love how you said it can pretty much
do everything photoshop can do but
i’m looking at this interface it’s like
wow it’s so nice and simple
yeah because it’s tailored towards
photographers right it has all these
if i told you about in photoshop about
the control shift fe
you would never know but you know that’s
such a cool feature but like i never
knew that
exists but right here it’s like one of
the most important features
and and now that i know i use all the
time but here
you can see that it brings it out
because there’s only three features and
that’s one of the features
like you said before photoshop i was
designed for so much as i go i’ll show
you why
this creates standard layer is important
in
okay yeah so next here
is basic campus the campus is pretty
straightforward so we’ve got two tools
e-waste common stamps yeah and
oh one sorry and then you can always
play around with this ooh
oh so if something is out
yep you can you can always fix it
you know but not this picture
ah no no
zero okay there you go oh well if
i say if anything goes wrong you don’t
like it blah blah blah oh it’s a little
return button
and go back to it just on that just on
that tools to me that’s not destructive
enough
because i can play around with it and i
don’t feel like i have to commit to
anything i can see the results without
committing
exactly so that’s that okay uh i don’t
do that much because since most of the
time i basically open an image in
photoshop and this is a
in luminous i basically go back to do my
all that stuff editing in photoshop so
i really touch it but uh unless i have
to then i mean if
sometimes i would add it on the row and
on my surface book too
uh i was too lazy to open photoshop or
bridge and just open
lumina stand alone and then just do
there’s something simple i just go and
erase easy and all that so
yeah it’s always handy to have the tools
you know you know you don’t use it you
have the choice you can
run it as a standalone or as a plugin so
basically we go down
a little bit lower so if we mouse over
you see this is an extension
they basically characterize all the
tools essentials and
creative portraits
and professionals yes well we’ll go into
those but then
if you go look down here there’s a
history meaning that she’ll always go
back
oh nice step yes non-destructive
i love that yeah exactly so you pay
along
and if you look at this you could
basically
just reset adjustment right here too
it’s pretty awesome yep so disruptive so
let’s go
into uh extension uh i’m basically i’m
just using this photo as a sample image
to show you what all this feature
does okay so this this photo just so
we’re on the same page this one came
straight out of camera looking like this
right i know i basically did a little
uh exposure adjustment on it that’s
pretty okay so just exposure
and you can do that in illumina 4 or any
other software but you just happen to
have done it in some other software you
brought it in luminar
as a jpeg image just like this so this
is your starting point
well let’s just put it this way you
asked me to look for pictures and i got
lazy i just picked this one
that’s fine yes and i actually
it’s fine and then this is an example of
any photographer’s need anyway you have
a picture and you want to use luminar to
enhance it
it’s actually a good one because you
know a lot of people like to show off
the power of the software
by picking a picture that starts with
that doesn’t look good to start with
right i don’t know it makes it look
great
after this i mean sure i’ll show you
another one
but this is why i like this photo though
because this one already looks good in
my opinion this looks great
but now the reason i put this because
they have a person it
has skydiving and structure and it
really showcases a lot of features
that’s why
okay let’s do it and so i guess we
you’re gonna use this to really fully
uh showcase the ability of the ai to
detect
oh yeah people to detect skin to detect
objects and take sky right
so if we go into the so the terminology
they use here
is a slightly different for example
light
was in light so they they included the
white balance
the exposure smart contrast highlight
shuttle
as light well the cool thing is they’re
not done yet
because if you click on advanced setting
forgetting about that there’s
there’s more to it there’s more to it so
you could control the white from that
point and also they give you a curve to
play with
maybe we didn’t want to play with right
this is a lot of functionality but they
lay it out in a way that’s so easy
and and if you don’t even click on
events it’s even easier because you
don’t get clutter and you don’t get
overwhelmed with too many controls
but once you get used to the controls
it’s nice to open the advanced look at
that
that’s right yes i actually really like
their smart contrast
oh yes that’s look at this if i minus it
if i minus it
look at it yeah look keep minusing it
doesn’t really break the picture that
much
no also if i freeze it it still doesn’t
break the picture that much
try using contrast in
either um anything so it became a raw or
yellow software yeah you freaking break
your
hair yeah because what it does it does a
global contrast change
right so what this contrast is it’s a
smart one
i want a smart one so that i’m pretty
sure they they apply a little bit of ai
into there
yeah right so it’s pretty awesome and
then highlight
you know same shadow that’s control
that’s pretty obvious
white point basically sim people think
it’s similar highlight
it’s not the album is different
um personally i don’t play with this
much unless i exactly know why i need it
but that’s cool because you don’t even
need to know what each tire does
i see what you’re doing you’re just
moving it back and forth and that gives
you an idea right away
oh yeah this is what the slider does
right yeah try that under in photoshop
and see
you find duals too and try to learn and
use it and when did you use it how to
use it that’s a
whole different ballgame it’s
overwhelming like sometimes those tools
that photoshop don’t even work unless
you select something
here you don’t need to worry about
selecting anything you just slide it and
you know exactly what the slider does
so this is um basically the curve it
gives you
fix that um and then they give it a wet
channel screen channel blue challenge
just like
in lightroom does lightroom have curve
yes yeah it does it does okay so this is
the light tool right okay let’s
get that let’s assume that okay you know
what there’s too much hair i don’t want
to deal with it
we go to a island hands and try with the
ai accent
yes basically it does
it calculated for you what the picture
needs like the contrast
the brightness the color you see even
the colors yes a little bit
and and that’s that’s that that’s so
easy
it’s easy to understand how powerful
this one slider does
like how powerful that’s where my slider
is unfortunately that i fixed the
exposure on this picture already
otherwise
i have a picture that is undone right i
always ask ai so how much do i need so i
just can’t crank up to
do they think say oh that looks pretty
good
or just drop down a little bit right and
again this this ai
hence does a lot right because you think
it’s just one slider but it’s actually
doing masking
it’ll mask out the sky it’ll mask out
the the structure and
mess at the person and it gives
different effects to each to optimize
the funny thing about retouching now um
you know in a sense i thought this
picture is done okay
but if i push ai2 i’m going to go like
like that
damn okay here i look better it’s
punchier
yeah it’s pretty yes so and then also i
love the way that how
luminous give you two type of preview
one is just like i yeah you know
point after once that’s a slider i love
the slider
because you can you can really see the
difference
yeah like if you want to zoom in you
could actually go and see the
differences oh whatever
oh so this is kind of pale now that
looks oh that looks awesome
yeah right yeah and this is all
rendering in real time too and we should
also
emphasize that your computer is not the
most recent piece of technology are we
going there again are we going there
always go there jeremy’s computer is
like six seven years old now and it
still handles
lumina 4 like a champ i i love it i mean
sometimes you might
see a little lag but for the majority of
it it works great and that’s a seven
year old computer if you have anything
more modern like a couple years old
you should have no problem with luminar
either as a standalone or as a plugin
you know why i
my computer is six years old because i
learned my lessons
i was a like a starving photographer
okay so at some point
when i don’t really ever try it in
photoshop that you try to throw some
filters onto the photo but
it takes a lot of processing time oh yes
that’s and i learned all the photoshop
trick
because i don’t need to use the filters
i can do all that manually with level
curve you know what not
which is to save me a lot of resources
in my computer to basically
retouch a photo that’s why i get able to
run a 16 years old computer
with photoshop and still able to bust
all that out
and surprisingly i don’t know how i
never thought that my company able to
run software plug-in like that because i
installed plug-ins before different
packet most of the plugins direct
a lot of resources yes yeah because
they’re not well programmed they’re not
optimized
yeah this one is well optimized like
look at this like we’re talking about
preview
tracking back and forth there’s no lag
whatsoever man what the heck
it’s pretty good it is definitely good
so okay continue so there’s also
a ice sky enhancements so you see how
look at that
basically just skype for me even more
right because it only enhances the sky
whereas the ai enhanced on top it just
enhances everything
and the bottom one yeah look at those
cloud formation
yeah before and after it’s even more
depth more definition now
yeah and again i can what you said
before makes sense the sky is
like one of the things that make your
picture really stand out
so yeah i can see right here like when
you make this this more contrast in the
sky the picture pops even more
so i’m going to remove that because that
way i could have a flat picture to show
different
functions sure so okay so when it comes
building
ai structure let’s see what it does
shall we yes i don’t know
when this structure is always about
structure which is buildings yeah
so look at that yes
yep yes right look at all those
rock formations and the building the
culture is just
but now yeah here is an interesting
thing
look at her skins yes it’s natural
it doesn’t change your thing it doesn’t
change your name
yes because it’s not a structure
the ai’s know where the structure is
where the person is they would not touch
the person
yes now i don’t know why they put these
features in there because for example
it’s 100 already but everything’s not
enough you can always boost it
it’s just it’s just so people realize
okay if i’m if i’m messing with the
boost slider
i’m going quite a bit extreme so
so i wasn’t understanding until i played
without check this out this is 100
amount on ai structure
yeah right because normally if you play
around with this kind of um structures
level whatever
like the just like the smart contract it
will break the pictures
yeah but because it’s ai it understands
when to stop
so even a 100 look at it it’s very good
it’s decent it looks great if i push if
i push this to 100
boost it doesn’t it doesn’t go that much
more because it knows it’s already at
the limit
yeah but if you look at the before oh
that’s pretty dramatic
it becomes hdl yeah it’s
really a wild picture so this is
basically just pushing it
yes to make a little bit more more
contrasty
this here boost yes make it look hdl
[Music]
look at every single little glass rock
that break it all stand out
see yeah still if you ever see other
people
other software that deals with hdl right
if you put a picture of a portion in
there
the person’s skin will look hideous
yeah yeah you will have like halos
around it or some blue outlines and skin
it just it doesn’t do well because
you know when you change hdr to
structure any kind of changes
looks fine because structure can look
different but skin
your eyes and your brain knows how skin
should look like so when you let’s
look at it look at that skin tone yeah
yes okay building
yeah hdl look skin change
nothing exactly yeah right i mean i i
see a little bit
lighting because it kind of relights the
skin well it kind of had to do
with lighting to match the uh the
background that it was changing
imagine it adds a little bit just a
little bit but it would not go over
i mean like overboard sorry does it
overheat that’s not even the word is it
over
no i don’t know i just
made a word cycle it’s all good
it’s not good and we we just passed
easter so we’re okay
sometimes we’re not easter weekend we’re
good we’re good
okay anyway moving on yeah okay
that’s structure i’m going with that
let’s go check out colors
um so it’s color just lady uh it has
saturations it still breaks saturation
is the same old tools
yeah ivan which you know does that
mm-hmm i always use i never use this
never really use saturation
you see how if i go 100 by on this
yeah look at this guy right yeah now
this
manual yes but if i go to ai enhance and
do that
that’s much better isn’t it yeah because
i think
you’re not messing with the vibrance of
everything else you’re just fixing the
sky
or we are but the ai is actually
leading us when to stop even though it’s
yes yes this is how much this picture
needs yes
so in other words it’s dummy proof when
we do our human
adjustment adjustment oh okay
okay uh uh well you have to
all right sometimes you know sometimes
we we see a lot of these hdr photos and
you lose
perspective of what looks good and what
looks overly done
so i think ai puts things back into
perspective it’s like okay
this this looks good it’s it’s enhanced
to a tasteful limit
yes and then if there’s a
color cast it will help it kind of did a
little bit i mean
if you look at her skin it has a color
cast of yellow
because i think it’s reflecting from the
building oh well not yellow
so if i bring this up you see how her
skin
looks a bit more clear now
barely i can’t i can’t see because i’m
looking at a pretty small screen
there you go that helps oh yeah that’s
looks sharp right now
not just sharper but look at her color
of the skins
oh yellow cat is gone
yes yeah right it looks nicer
yes it’s gone
so that’s something that a lot of people
don’t know about
or it require other software to do
a lot to able to get this clear no color
caps
right here you can remove it just like
that what’s like what is that slider
call again
we move color cast ah remove color cast
yeah the fine is a little bit smaller
sometimes i’ll actually read it because
that i can’t see too well
remove color cast that’s a pretty cool
fill slider i didn’t realize that was
there i’ve been using illumina for
for quite quite a few few months now and
i love it
and i don’t even go through all these
filters i just pick on the two ones that
he did earlier
uh the ai hens and ai sky that’s it
that’s all i need well
that’s all you need to be honest really
but then if you’re gonna
call it this obvious advance if you want
to go deeper right
i love this this is what i love so
that’s why it’s good for amateur
and professional you can see jeremy
knows all this stuff so he likes to dig
deep into it
yet it still satisfy all his needs
because it does
everything he needs in the advanced okay
using if you actually sit behind me look
at my workflow i probably just go for
the ai
so we’re just demonstrating what you can
do but you know technically the ai does
everything you really need but uh
but the ultimately is this you can do ai
and do
fast um retouching but at some points
you want to take me as a human being
you know don’t let the company tell you
what exactly what to do and
you might want to learn the program
yourself and do more creative things
that
the ai can do the ai will help you get a
perfectly aligned
well-balanced and well-expo image yeah
but if you want something out there
yeah it requires creativity which is why
luminaire also had that
it’s just not like limited youtube oh
trust my ai yes ai is fine and good
but they also allow us to create yeah
that’s why it’s wonderful
yes so one thing i really like this is
that it has
in this color advanced color setting it
has
oranges yes yeah a lot of software
doesn’t have orange and orange is such a
key color because
what the color of skin is orange right
like yeah
sure actually but yeah orange is a great
slider because
it isolates the skin and you can really
make
changes to just the skin i like that
so if you want to play around with it
you could um at some point like this is
the best situation because
there’s a lot orange yes typically
there’s not that much orange
elsewhere but in this stream yeah
i feel yeah right so but if you
do in this case you want and then it’s
not giving you that kingdom you want to
adjust it here
yes and then almost every if you look go
go on there’s like no well not light i
don’t have it
uh here we go here as well you see how
all that it has a mask yeah you could go
in any mask
you could go in there and just tell you
know what i just want this to be
affected
yeah yes got it yes exactly and i love
how you use the brush too you just kind
of brush a little bit over it you don’t
really need to like
really brush in the detail because
there’s no orange out there even though
i went out it doesn’t matter
the effect when you have the mask
on on top of this it changes it it
showed me that what kind of
tools i am a brush okay what kind of
mask what kind of dude could flip fill
the method fill all the masks
inverse it clear it copy it show mask
how much more feathering do you want it
so and then they got a quick ai
button here so you can see where i
always like that yeah
so you could change your brush size here
the radius velocity 50 hundredths you
know you could do all that basically
just like in photoshop yeah
this is you know lightroom has masks too
i would say mask with quotes it kind of
does
like you have a brush tool when you
click on it it creates a virtual layer
but then you can’t really edit that
layer if you have another brush tool
because then that’s another layer right
you’re very limited in the layers that
you have in lightroom this
this is different this is exactly me
making photoshop because
each adjustment tool has its own mask
this is a layer so that’s what it does
but
anyway again all this is advanced
feature because all i use it for and i
can create
amazing pictures with just the ai
uh enhanced and ai skin that’s or ai sky
ai enhances all i need but again you
have all these flexibility so that when
you want to dig deeper
you want to release your creative um
juices
and let it all flow then you can play
around with all these sliders and
really go to town with your pictures so
this is a very interesting um black and
white conversion
it’s actually very fun to play with now
you could just go ahead and click
convert to w
yeah it doesn’t work yeah it looks
amazing to be honest
right or i don’t know why they add all
this but you can also tune the
luminosity
off yeah okay now you can ass around
with this
check this out you can play around your
channel and change black and white it
won’t manually
or just click convert which is i would
say it’s a ish but yeah
you know black and white have different
tastes too you know a lot of people have
different
uh version of black and white they like
you know sounds like it will wear some
green channel more but yeah this is how
you play with it now
the cool thing about this is the
saturation you see how
okay if i just play with red look at
that
oh that has a really nice look to itself
in its way
right it’s like another look to it i
like it see look at that
yeah so what it does is try anything
black and white to do it down but bring
back the red
the red one looks nice i like the red
the
for this particular picture that the red
looks good
so this is how i use it sometimes if i
go to
color and i go to saturation why am i
oh there you go i go saturated right
over saturated conversions go to
saturation
yep okay i’m gonna bring it down
yeah yes so you
yeah you’re really playing on the super
saturation now you’re controlling those
levels
now you are controlling every single
color and
yes with black and white so you could do
a lot with this yeah you know it
looks different yeah and again tools
normally you would have to pay
lots of money for like photoshop to
really take advantage of all this stuff
because
lightroom you can you can barely touch
the surface of all these
functionality i mean um if
what i consider is they never really
said that but
every single one of two here is a
different version of
a color grading tool for you to adjust
your um pictures
that’s how i see it so you think that
black and white conversion would just co
like strictly black my conversion
actually gave you more
like yeah you got a ton of uh room to
play around with there
there’s a lot of different options you
can tweak
okay and then detail enhancer um pretty
much it’s kind of chopped in
you know where i’m going there with uh
probably rocks good good idea small
detail
so they basically break down
you see all the small details enhanced
right
and then medium details oh
wow so it breaks it down
and how you want this because sometimes
you know
it’s also this is probably okay see this
is different now
yeah it’s this this is a good boy effect
this is not a
game so it is not shopping it’s basic
detail so
with details even skin texture are as
detailed
so you probably don’t want to mess with
that yes see how
when you do medium detail it doesn’t
affect as much ah
again large details yes on the ads and
it’s not skin tones
yes so when you play around more and you
want full control and knowing how to
get more detail showing
a wave play yes or just go ahead to
sharpen
yeah that that let’s ai kind of figure
out how you want to sharpen it and
yeah see how sharp it doesn’t really
match with your skin tones
right yes i’m pretty sure it does some
kind of like
ai and it knows what part is skin
and then they have more there’s always
more
yeah detail protection those event
sliders are sweet
i’m not going to go for it this is too
much eventually we could
we’ll make other videos about this maybe
yeah sure i i love this because you’re
really showing all these little tools
all these extra features that it’s all
part of software but
again you don’t need any of this to make
your pictures look great the two
features at the very beginning that we
showed you
ai enhanced and ai skinner hands ai
enhanced the ais
enhancement just as two that you need
yeah you gotta that’s it
that’s all you need to take your picture
like ten times better and you’re done
you’re literally done but like of course
as photographers
sometimes you want to spend a little bit
time to tweak it just the way you want
so you can do it and i love that jeremy
is showing us
all this tool because it gives you a
good understanding of the flexibility
that the software can do
like one of the the features that stuck
out to me just
when you were showing to me is like the
sharpness on the rocks
and the details right because i think
okay
i have a nice lens i take this picture
and then when i look at pictures soft
i think well i just need a better lens
let me go spend a thousand bucks and get
a much better prime lens stop it down
and get the sharp detail on the rock
or i can buy this software linked down
below for less than a hundred bucks
and you can take other people you and i
did yeah exactly
right you could take a picture from a
cell phone right and enhance it and
it’ll look
like a million bucks it would look like
you took it on a dslr
with the best lens out there like these
little details here can all be
manipulated in software people don’t
really realize that because they think
oh to be a purist photographer
you have to have the best equipment you
have to have really good quality lenses
to get
great sharp pictures but here you’re
doing it in post and it looks fantastic
in fact it looks better because you can
control how sharp you want the rocks
right look at how sharp that is amazing
yeah it’s amazing yeah and if you guys
are curious down the link below
are some cameras i love the canon m50
it’s like a consumer level camera but
it’s so
small and compact and these are the efm
lenses really lightweight and small
it’s got the flip out screen you can
look it in the back you can tilt it up
to take pictures
and you can flip it around like this to
vlog so this is a really great camera
for vlogging
and i just love it and just kind of the
reason why i’m bringing this up is
because
it’s a very affordable camera that can
let you take amazing picture
combine this camera with this software
the lumina 4 and you have a solution for
some amazing picture
you can take pictures you can charge
thousands of dollars
for and i kid you not as a wedding
photographer
shooting for 10 years like i can produce
amazing results with a camera like this
the canon m50
with some software like this that will
rival
what i shoot on a professional medium
format camera for example
so manipulation in post-processing goes
a long way you don’t need really
advanced equipment to get
amazing results if you combine some good
equipment
with some great software like lumina4
okay so moving on sorry about that
hey did you put my cameras on there too
my paper camera yes
yes down below there are because i’m a
canon guy
but it’s not really about brand my
friend here in germany he likes to use
fujifilm cameras right so down below
guess which two fujifilm cameras i have
xt3 and the new yeah
xt4 yes that’s it yeah i’m getting that
so what’s the difference between those
two and which one which one do you have
and why
so i currently has xt3 which to me is
almost
i got too excited it’s so great
um xd3 to me is almost perfect it’s
actually there
the only thing is music is the ipis
which is
in camera stabilization um
stabilization body i’m sorry in body
yeah ib
right there there’s a different brand
called in camera
and xt4 added that yeah and also it
enhanced
a whole lot on the video capacity
in that camera so that’s a and then the
screen will actually flip
so it’s become the perfect blocking
camera as well it’s not just canon
yes it’s a funny thing is when
canon sorry when fuji film introduced
the xt4
it’s not a replacement for the xc3
because like you said the xc3 is so good
already
basically what they did is they moved
xc3 down to a lower
slightly lower price point and then they
had the xd4 come in
as a little bit more expensive we had a
camera that has a flip-out screen
and in-body camera image stabilization
in addition to that but if you wanted to
be on a budget you could still get the
xt3 which is a perfect camera
for mainly for photography needs if you
want to vlog
as well then i definitely recommend the
xt4
because the xt3 the x series that you
have structured xd
xd3 it’s they consider okay it’s not my
word
it’s considered a photographer’s camera
meaning that
you really need to know how to take
picture to operate the camera
oh uh unless unlike the current um
camera system who has everything
perfectly exposure
even in in body stabilization
meaning that you could have handshake
you don’t even know how to hold your
camera
those no technique okay you know all
right don’t take me off yeah so
the xd series is considered like the
pope i want to say pole version paul
it’s more like for working photographers
yeah when i say pro i mean
people who actually enjoy taking a
picture
not letting the camera take a picture
like the person is still holding him or
taking a picture not liking the camera
holding pictures so
that’s how they identify the lines yeah
and i kind of like that because you know
with cameras being so advanced
and so powerful now you kind of
allow it to take over yeah you let it
take over the whole point of why you’re
a photographer
because you want to be able to control
all the elements you want to really dial
in
to take your image
the fuji camera because it can
completely
let you let the camera take over with
all the automatic stuff
right same thing and then it also allows
you because all the dials like uh
shutters uh apertures and answers all
outside you could always change it
by manually manual focus is always out
there just for
one click so it’s it basically gives you
the automatic function as well as
the main function it gives you both same
thing as a luminance four
it gives you ai everything also it gives
you full control as well
yes yeah that’s what i’m looking for in
this because when i have to work it
within workflow of course
if there’s ai does automatically more
exposure everything fine you know get
get the work done yeah but if i play it
right and i’m fully in control
i also have the option yeah i love that
concept oh yeah
doesn’t mean you always use it but it’s
there when you need it
okay so uh the next tools on here is
moving on yeah
i don’t think we can really finish
everything i would do as much as i can
yeah we should actually wrap it up in
maybe the next five or ten minutes
because i think
yeah the point is the point here is it
has so many tools
that you can explore all of it um at
your
free leisure because there’s so much you
can do but again going back to the very
basic you just need those two sliders
the ai enhanced and the ai sky
enhancement you’re good
you’ve got so much range to work with
which is
those two sliders like really so
if there’s anything anything else
important that you want to show
um jeremy uh maybe let me finish this
two functions and then show a little
thing and then we could just swipe
up yeah and then we could do another
video maybe later just to
go move on to you know the next thing
yeah
so uh unfortunately in this picture i
can’t really show you
the noise but it’s pretty
straightforward you have digital noise
help you remove it both the luminance on
your voice and the cut noise so
straightforward right so beyond that and
then there’s a landscape enhancer
um there’s a lot okay this is the reason
i choose this photo
got a person in there got skin there got
landscape got structures got sky okay so
you can show lots
of elements here all right yes so
the haze that’s what it does just like
in photoshop it’s basically kind of like
getting the contrast of the color yes
okay so this is the main you see how
this landscape enhancer dehaze
if you ever play with the photoshop’s
dehaze
it’s a bit different it’s probably
global
and it’s everything they’re both global
well they are okay
oh but the differences is the photoshop
dehaze what it does is basically
increase the contrast
okay let’s say if you have a picture
which is kind of muddy
or foggy okay it will enhance the detail
behind the fog
for you so it shows more but if you look
closely what this
does
you see how it detected it’s more like a
golden hour time yes
so when you dehaze yeah it how you
increase that
a whole lot yes so it regardless of skin
tone but look
without looking at the skin you just
look at it building the structure
yes it looks amazing yes because this is
beautiful landscape it’s never for
never meant for skins okay typically
most people that take
landscape usually don’t have a person in
there
so if you do you can always go and edit
the mask and kind of master it
always matter exactly so
and then they also have a golden hour
it it’s similar but it works differently
you see how it doesn’t change might but
they apply a golden warm tone onto
all the subjects and building all that
but the contrast
doesn’t increase that much only the
color okay
and then this one is kind of weird uh i
don’t usually much
leo enhancer it only do the greens
you see the greens yeah it might be an
effect some people like
no that’s why this tool is mainly for
landscape yeah
for landscape pictures yeah so and then
there’s the fans you could of course oh
this is
this is what they do because at first i
noticed that like who would want to read
that
right right it changed the color
that’s pretty cool actually so imagine
you have a
scene who’s all green right yeah you
could change the seaweed to
more like a fall or winter scene if you
want that
that’s pretty cool yeah so
yeah it took me a while to realize that
because i’m not landscape photographer
myself
uh okay so let’s that last a lot least i
think this is something you hate
i don’t like vignetting but it’s there
vignette yeah
but but it’s there when people like it
the reason why i don’t like it is
because
when i shoot with a camera where the
sensor is too big and the lens
it kind of creates this effect i i
always think oh it’s a lens defect but
it looks nice if you use it in subtle
uh usage it does look nice so you know
to the left it darken the corner
yeah right pretty straight forward and
then you can change the size
yeah now i never knew what the fan
setting has each
so you know basically it’s more rhymes
you could change the size of the
vignette it’s more of a square versus
around
uh i always say this this is starting to
get into the tacky realm
right yeah it is so but you know almost
every software has it so yes
why not right there it doesn’t mean you
have to use it exactly that’s everybody
use these features
so this is all the tool we just talked
about which is under essential
right by just just this one tap yeah you
could do a lot already
right but let’s get um we don’t have
much time but right let’s get into
the creative route just a little bit
okay to show you a little thing
right the eight when one of the key
features they have is the ai skin
replacement
sky again sky yeah ai sky replacement
yeah
so let’s go in here and let’s change
something to let’s say uh
sun sunset boom yes
then that the speed that does this is
amazing because
again you never had to select what part
is sky
you just go to the ai sky replacement
and you pick a sky
and it does it that’s it it’s done so
simple
look at that it just i like that sky
this guy looks great
looks fantastic just choose the guy that
you like pretty much
as simple as that and it looks really
good it looks really good because again
it relights the subject to make it
like blend better and if you look at the
edges they’re very well done too
and there’s always tweaks if you want to
tweak it but
it does a great job of masking oh yeah
it it found majorities
of the stopper and like for here yeah
because it was
the highlight right highlight itself and
the pillar is a little bit so
easy with the slider right yeah yeah
easy yep yes done yeah
clean look how clean that is that’s
great yes
right yep and if we do we light scene
a little bit less and we don’t want that
much
it looks perfect just like that it looks
really good what
what more can you ask nothing man i’m
impressed
i like this so for this function here um
we could talk about that more in depth
in our next video but pretty much it’s
straightforward
right one click flip the sky uh change a
little bit here and there
babe we can talk about that in the next
week i don’t think we have enough time
yeah you know i just want to show okay
last thing is yeah this is the features
that will save you a lot of time yes
okay so yeah do you have any other
questions david or anybody
out there have any questions nope um i
don’t think we have
any questions right now do you think i
think you did a fantastic job
explaining all these features um and
especially just going back
let’s reset this picture to default and
just show me the three sliders
that you need to make this a great
picture from
beginning so okay so i could go back
here and go reset
adjustment right so this is very
beginning and we’re just gonna use the
three ai sliders just to make this
picture to replace this guy
to just auto enhance it and to make it
look really good
where are you going jeremy i’m gonna
unshare you let me let me know when
you’re ready to share your screen
jeremy did you did you did i lose you oh
no
i lost your skype fee uh jeremy
are you there did i get cut off again
yeah welcome back jeremy from
nowhere here he is again
no worries let me know when you’re ready
to share your screen i’ll throw your
screen on there
okay i am sharing my screen again
yep let me know let me know let me know
it’s not letting me stop
well but you know what we kind of web up
on yeah that’s fine
yes anyway so so those are the three
sliders that
uh really all that matters is so those
those three skyers
which one are those jeremy you got uh
that would be the ai
enhanced yes uh ai
structures yes and then the sky ais
replacement enhanced replacement yeah
yes so yeah this two
basically yeah only you play one this
three you basically got amazing
yes yeah pretty much and i mean that’s
that’s really all i do and i think it
does a fantastic job
and you know we wanted to show you a
more in-depth tutorial to show you
really what you can do
but you don’t need to know all that
because this software is amazing by
itself
the price is down below it’s under 100
bucks it works amazing and it’ll take
your photography to your next level
i’m going to wrap it up by showing you
one more video from the website because
i just love
the website it has so much stuff in here
so
uh oh and also this is this is the
product on amazon
you can see it’s got when you get a
chance check out some of the reviews
there’s some good reviews and people are
finding this software
very very useful i mean don’t take our
word for it um there’s a lot of people
that love
the software because it’s amazing but
let me let me um
let me wrap up with one video here i
mean i can just pick any video
and i’m sure you’ll be impressed oh this
is this is a quick um
recap of what we did um yeah i just
showed that
yeah pretty much but here’s another
picture right
so jeremy you want to explain this this
picture
sure so if you can you hear me turn off
those ai
buttons so you can see the b4 yes so
basically if you take a picture which is
the backlight
right and you want to retain the sky and
for that one exposure picture okay one
exposure this is exactly what you’re
going to get
you got a darkened uh foreground a
subject in the front and then but you
get a sky
yes you get a sky d so that’s what you
get yes now if you turn
on the ai accent yes ai acid
applied apply so it will know
how to balance that out exposure and the
white balance and all that
so that you the subject in the front and
the sky will
get that perfect just how humanized
looking things right now
this is how we look at it right if we
look at it not the camera
yes but we want to this is how we look
at it this is how the eyes have
a lot of dynamic range it can see all
the colors in the car
while seeing the bright sky at the same
time but our cameras
typically don’t have that broad dynamic
i think no
you could call me wrong but i believe
human eyes has around 42 f-stop
and we could interchange those f-stop
like
unlimitedly unlike a camera oh yes
a camera cannot ever be a humanize
because they only have able to
fix one stop per time yes but our human
eye can change
any time we want with 42 f-stop i mean
what uh
uh a camera head was 16 f-stop
yeah yeah 2016 depends on the lens
yeah 22 is what i remember so that’s why
like we see this
yes while the camera can’t right but ai
would help us
but then the good thing with digital
photography yeah would be shooting raw
files
those information were captured within a
raw file
we’re just not seeing it yes but the ai
could help us bring it out
yes so then you got another slider down
there jeremy
which is the ai enhancer which look the
skies right now will you turn on
boom now that looks amazing
did that only apply to the sky to
enhance the sky it not touched the
foreground one bit
exactly and like when i bring a picture
into lumina 4
this is essentially what i do i hit the
ai access
slider i enable it and i slide it around
a little bit and i hit the ai sky
enhancer and i slide it around a little
bit and if i
want to i can replace the sky in this
picture the sky looks great already so i
don’t need to replace it but if i want
like a dark
stormy sky i can replace it it’ll have
the dark stormy
cast on the car and it will have a
totally different effect
but those are pretty much all the things
i use luma for
i don’t use a lot of features because
you don’t need a lot of feature that’s
what makes the software so great it’s
just so
user friendly always good to have it in
your belt
of course of course it’s nice to have
but again
i want people to realize that you don’t
need to spend a lot of time
because this software allows you to do
it so quick
right just a couple of sliders and you
got it but if you want to you can dive
deep
and the cool thing about diving deep is
once you have like this perfect recipe
that you want
you can save it as a look right jeremy
yes we could talk about that next time
we could yeah so and
those those are amazing features so like
i promise i want to show you guys
one more video uh before we wrap up and
i love this website here oh before i do
that
jeremy was talking about the noise uh
feature
and we couldn’t really see it but here’s
an example of the noise right
you can see like on the seats here a lot
of noise and you even see in the window
here
a lot of noise but this software just
takes away
and really fine tunes your image makes
it look
like a really really high quality image
like you could be shooting this at like
iso 3200 or iso 6400
but with this noise filter applied it
looks like iso 800
it looks very clean i like it i really i
rather use that feature i actually add
more
film gray into my image rather than
removing it depends on the style you’re
going for
so let’s pick one more video because i
like if you guys ever want to check out
the software go to luminar’s website
skylum.com and check out these
one-minute videos they’re all
really good i’m trying to see which one
is my favorite one here to show
if you if you got one jeremy you want to
see you want me to play let me know too
uh i don’t know you pick i can’t i will
play
i want to pick i do want to pick but
just in case i don’t want to make you
feel left out
they’re all really good um i think i
want to show the one
of this japan um shot here
because oh yeah that’s a good one yeah
because it’s it’s nice to travel
and i know a lot of my photographer
friends
um travel vloggers they love to travel
and sometimes they’re taking pictures
with something like a canon m50
or canon uh 6n mark ii or even a
fujifilm xt3 or fujifilm xt4 all cameras
link down below
or even if they travel with just the
iphone or samsung galaxy
s10 for example they can take those
pictures
and pop them right into lumina 4 and
create amazing effects
oh yeah yeah so let me demonstrate what
that what what you can do for a travel
photographer
or a vlogger so here check this out
using lumina 4 you got a beautiful
picture like that before and after
totally different takes your photography
up to a whole
nother level basically two sliders an
accent
and ai structure it’s all you need
you’re gonna adjust the sky a little bit
you can actually do a little sky
replacement put a sunset boom you’re
done
just uh some advanced flip flip the
sunset on a different side so it’s more
believable
change some settings there again
everything is slider based and again you
don’t need to go down
yeah oh wow like very small
little changes right you don’t waste the
time masking anything
you do spend the time adjusting all
these little things here
but the results it’s like wow right just
a few sliders and look at that
your photo has this elevated
to the next level you took that word
right out of my mouth
because i took that word right from the
video
very good jeremy very good well
that kind of wraps up our kind of
demonstration here uh we just wanted to
show you guys how powerful lumina 4 is
and how it can transform your photo
to the next level with very simple
slider control
um and for a price that’s cheaper than
the most inexpensive lens you can buy
for your camera
it’s under 100 bucks uh if you buy it
from
amazon you can always have this amazon
customer service
i know if you buy it from skyline’s
website directly there’s a 30-day
money-back guarantee too
so however you purchase it you’re going
to be really happy
i think the software is fantastic i use
it all the time
in both my amateur stuff as well as my
professional wedding photography stuff
and remember i shoot weddings for over
and i still use it and it always
impresses my clients because
i can post-process my normal picture and
i can throw in a few
that i process with illumina for and
those
actually happens to be some of the
favorite ones so maybe i should do
more of that than the other but
nonetheless i use it professionally and
i can use it
amateurly as well jeremy anything you
want to ask add
as your last as uh some of your last
words before so
what is that email that if they have
questions that they could ask us again
yeah so they can always email us at save
money
at pixel establish dot com uh we have
the coupon code down
well actually not down below because um
the coupon code is pixel established
but if you have any problem applying it
let us know
drop us an email again at save money at
pixelstables.com and we’ll help you out
yep all right and yes
that’s it all right well until next time
yeah we thank you guys for tuning in
thank you for watching
thank you for following our journey as
we explore and share with you
all the great things about luminar 4. if
you have any questions always stop by
our youtube channel
at youtube.com pixel establish if you’re
into tech reviews
my channel is eutectia go to youtube.com
and we’re always
always happy to answer your question and
make sure you follow us
on youtube follow us on amazon and check
back next time for more great videos
on photographies and illumina 4. all
right guys
thank you again and have a great evening
we’re signing out
adios bye three two one
and we are out
[Music]
[Music]
you

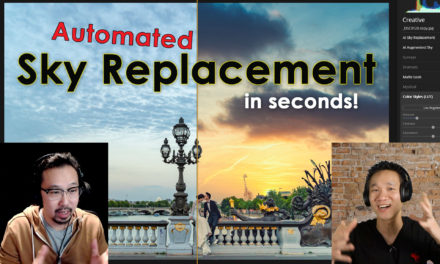


