
Learn Photography SECRETS/TIPS on lighting, posing, storytelling, retouching, color grading, photoshop, and business! Understand how to make your colors POP! Feature Jeremy Chan, FujiFilm X Photographer, WPPI Award Winning Wedding Photographer and WPPI Judge!
DISCOUNT Link on Luminar 4: https://www.pixelstabbers.com/luminar
BONUS: Enter in the coupon code at checkout “PixelStabbers” for an additional $10 off!
Stella Pro: DISCOUNT LINK: https://www.pixelstabbers.com/StellaPro
[ discount will show up in your shopping cart! ENJOY! 😊 ]
**************************************************************
Let’s stay creative and active during this crazy time!
In this lecture, we go through the basics of color concept, also show you tools in post-production to help you manipulate color in your photos to enhance the visual impact. This is good for drawing in more attention of your audience for both toward your photography business marketing and also help elevate your photography competition gameplay.
**************************************************************
#MasterClass #FreeCourse #Luminar
Where to Buy?
cupón luminar: PixelStabbers
Luminar 4 link: https://www.pixelstabbers.com/luminar
Stella Pro: DISCOUNT LINK: https://www.pixelstabbers.com/StellaPro
[ discount will show up in your shopping cart! ENJOY! 😊 ]
Video Transcription
hey we’re going live we’re going live
are you ready alright hey guys this is a
piece of stabber
my name is David this is Jeremy in this
video we’re gonna hey in this video
we’re gonna show you guys how to take
your teacher photography to the next
level
Jeremy’s been doing photography from 15
years and he started out as a digital
graphic artist so he has all these tips
and tricks and he’s gonna share all that
with you today so I’m sure you’re gonna
get some good information on this video
we have questions always ask below so
Jeremy why don’t you talk a little bit
about yourself all right so I’m oh I
don’t know G expert offers me up because
they need more portion people and also
I’m sponsored by Microsoft as well which
I love it I got a few laptops gigs and I
also teach in WPI and different
conferences so I do trained professional
photographers especially on the area of
post-processing that’s crazy because WPI
is such a big conference all the
greatest wedding photographers I know
are always there and did you know I shot
wedding for 10 years and I never ever
which is WPP I bet you opposite I’m a
born in WPI my career stop post followed
by WPI so we have very very different
backgrounds one other thing is that
you’re a digital artist by nature to
start out with a meeting photography for
myself I just kind of went into
photography by picking up a digital
camera and speaking of which did you
start photography from a digital age or
did you start using film when you
started shooting I start with digital
first but I did when after year two I
went back and took some classes to learn
how to do shoot them and develop films
so you know I get a whole backstory that
ganda is no be a more solid background I
give you a lot of props for actually
even going that route because I don’t
even need to actually touch film to know
how complicated is I started looking at
online and it’s a fun thing so people
but then it’s not because you know in my
garage I still some chemicals back when
I was shooting film I don’t know what to
do with them they’re like they’re not
eco-friendly no those are the
chemicals ever they’re bad for the state
ocean environment they smell you have to
have a darkroom now we have lightroom
but you have to have so much around it
and the fact that you have to be very
precise when you take a picture because
you have my red 35 shots per roll film
whereas in the digital age
I can take 10 shots before I dial it on
my settings to get it right so I can
waste shots not feel bad about it I
would be paranoid if I had to shoot film
and be limited 35 shots before I had to
switch out the rules like that’s not for
me I shot that buried I mean if you go
to some of those we the old school was
always good but classic Fatah V museums
right you see some of those really good
photographer those there our focus yes
yeah there is not as linear that means
that something catches something on Tim
it’s amazing already it’s not in digital
we have so much gears maybe can’t get a
sharp image that you suck because the
camera supposed to be really good well
that’s piece of peeping and that’s like
another issue altogether right then
you’re not worried about the moment
you’re not worried about the expression
you’re just worrying about making sure
it’s sharp which 90% or 95% of your
audience probably wouldn’t even know it
is there sometimes
hey it can be part of the artistic field
it can be blurry it can be soft but
anyway let’s just touch it a little bit
about like what’s a really difference
between film and did show because you
have a little film background right yeah
well if you want cuz I have the same
lectures that I teach at WPI try to pay
for it but I will to share with you guys
right now for free yeah awesome like
this is this is awesome
thanks for doing this for me and just so
you guys know the context jeromy’s does
this lecture at WPI for $129 and when I
was I never been to WPI but every time I
see these kinds of talk like always
wanted to go to them and you guys ready
for a treat because Jeremy’s sharing
everything plus more because we have an
unlimited time here so this might go for
like two hours I don’t know normally you
probably should get home doing nothing
might as well right all right well let’s
get on with the presentation I’ll be
interactive I’ll ask you questions you
can ask me questions and our audience
later can ask questions
and by the way audience you guys make
sure you subscribe and like this video
if you haven’t already done stuff ok so
if we want to talk about photography you
know we’d switch around from vim camera
right camera right looks the same so
technically they’re the same but inside
is difficult back then there’s really
big talk about how photography is
supposed to capture it light and shadow
right so it translate for me from from
film to digital now back in film yes we
are really capturing light and shadow
because what happens the frame has
chemical on top of a plastic and those
react the light and that it contracts it
to your image so we are really capturing
lights and shadows right but what
digital comes in it’s slightly different
now we are not shooting films anymore
the light after hitting the sensor that
we placed a film so we’re not just
capturing there’s no chemical in it it’s
just big li Alltech ok so what does that
mean though that means that we’re not
just capturing light and shadow we’re
capturing pixels wet green and blue
that’s what inside it the sensor and
that’s how they translate into a picture
ok so once we realize that’s different
flame and did your are different okay it
is different so meaning what well this
is what how to censor pay so there’s
different type that’s a better one the
normal one most most of they have the
left side but and Fuji has a different
one we could talk about that that’s a
whole different video because I this is
that well I won’t say I’m right but this
is my believe is that as long you
believe that in digital we are dealing
with pixels okay right let’s say on that
concept first we’re doing pixels now
sure so let’s pick so anyway pick so is
a short term work for picture diamond
you know right make sense okay that’s
not important that’s 9 4 4 time there’s
a philosophy thing so let’s keep that
now if you have a picture right this is
the picture obviously is a pic yep it’s
a photo right right use
let’s say you have Photoshop owner you
can sue me right software some can some
can delete but let’s say you have
Photoshop just assuming all the way to
you sure this is like what 14 hundred
percent yes is what you see what up this
baby yeah
pixels pixels I see exactly so when you
building what did you Kevin this is
pixel we’re working to pixel so right
now the concept is we know we see is
pixel now what do we do with them so now
we know what we’re dealing with we could
do something with them right absolutely
so another good example Legos right
Legos right by a pile them they’re just
colorful pick Legos but if you know what
you’re doing and you have a concept in
creativity this is what you can do you
could do a puzzle it up have you seen
best joke from Fox like their pay with
Lego right now let me show that car no
that’s what’s amazing actually point is
if you can able to mitigate all the
pixels cut Lego is you could create
whatever you want it’s not just about
lighting shuttle right right pretty much
because the image is built upon pixels
if you mean it like the pictures the
right way you create the image you can
recreate it if you go back it imagine
see how the face of him is white right
yes I can we paint all the way to
different college and just face yes
yeah but see the hardest thing I
struggle with that is yes I can replace
the pixel but how do I create the
picture so that you have this perfect
gradient so it looks realistic because I
can just replace the whole bunch of with
a paintbrush and it starts looking like
a cartoon right so you gotta you gotta
really know how to replace your pixels
that’s where I’m leading it to okay good
but first things first though here
here’s the concept
stay on this page first so okay for
example now all the cameras you probably
doesn’t matter which camera way now
today every single camera is easy to use
right if you’re emotionally or actually
any kind of camera and I have live you
meaning what you see is what you get
right your white balance can be Auto so
camera thing for you already
yeah what you could put your camera in
primo I mean although some of those
professional camera don’t have chemo
right but right it has a certain auto
modes in there that you could get
automatic exposures and whatnot it does
take a lot of the hard guessing work out
of it and then back there with the film
camera the hardest part is the focus now
you have auto focus you got phase
detection you got i detecting a smile
detection yeah that’s so easy right so
you think about it back then with the
film camera ootek ninety percent of time
you have to figure out the tech the
technique how to capture a photo right
and only probably 10% you can become
creativity or not just know it’s all the
time you have left because all the time
you spent dialing it in exactly now is
switch alright in digital is that you
only have to put a 10% effort and get
the image for some time to do what to be
creative right and you gotta you gotta
really you got really take upon that
because now the play field is really
high because anyone that buys a digital
camera pulls out smartphone can already
take a really good photo so you got you
got a level up with game now that nine
percent time you have to be creative you
better make nice of that and be creative
right it’s different now but I can
actually everybody has a camera because
this camera ever is the camera that’s
always with you we need to take a shot
right so it’s not about able to get a
picture is not everybody can get a
pictures isn’t gonna picture that is I
wouldn’t use the word amazing because
every photos supposed to be amazing
because it’s God’s creation it’s
supposed to be representing you
yeah a picture that you create suppose
represent who you are so I agree now
that they with digital camera but
digital photography yes
capturing is easy even lighting is easy
we do videos TTL where they’re all just
available light is easy
if you if you’re doing SAP your light
your Stella light yeah what you see what
you get but you know a little basic so
I’ll give credit to people that can use
a digital camera with some ability to
adjust the lighting but yes that’s gonna
get any more special lighting but daring
to me I find that a photo still doesn’t
matter is film or digital it suppose to
be long lasting is suppose passed on to
generations so something in that before
has to be able to last right yes is it
only timeless it’s gonna capture the
moment and be looking good even a
hundred years from today this guy look
great now everybody has a different
motive when they take a photo everybody
has a different style outside know the
style be related to the personality to
me not everybody has it right away you
have a search for it I would say you’re
right right where my begin is here in
this photo this is in France Paris the
new this this is an amazing photo like I
I taken a lot of beautiful pictures
myself and like Bay Area on different
areas but I don’t even travel outside
the Bay Area this is amazing I would
Paris looks amazing
yes in photo but when you ask ago there
is smells man you know what are the
things I always concern about is even in
the Bay Area where I shoot a lot of
pictures I always get passed around with
like security guards police and then
just passenger people asking questions
away but mainly the security guard it’s
like how do you deal with them outside
of this country I would say like that
over there so before I was Fuji then
that was us only as of the others and
that’s why I use Sony and I used some of
these small mailers so I think the key
thing is to not bring too many years
that’s actually very good fact because I
always shoot with my 1dx
and even when I take that one DX to my
nephew’s birthday party at the zoo I got
kicked out there like this is
professional gear you can’t shoot here
but
tell him this is a family this is my
nephew they’re not paying me this is
like if I was using my point-shoot or my
cell phone but because they see the big
gear they’re like can commit well that’s
what my career I see people that have
different motive I mean there’s no way
wrong some would say that I have to have
the best gear and the gear is that
better than my clients because why not
and anybody can purchase the camera so
right I beep there before I’d be there
before seriously like I have client have
way better gear that I do when I was
shooting their wedding right of course
as photographers we all know it’s not
about the gear like having the best year
would give you like 1% better
that’s why do story I’ll tell you not
yeah I went to one wedding while I kid
you not the Guzman they have a Grossman
table right
every good fun bought the camera yes
daddy was I can’t they all had like
camera Nikon so I was the only guy I
have my Sony NEX Melies camera back then
and yeah okay crop sensor oh okay they
have they’re like canon 5d mark ii my
free or Nikon and these have a hydras
all like put on the table yeah and then
one of the guys come on poach music
beautiful tougher right oh yeah yeah say
wow what kind of carry holding on that
little tiny thing what is that oh this
is some VX you know they child of the
army whatever but right a lot of time in
doing the wedding banquet they play as
their slide shows yes which I shot the
engagement you engage my picture for the
couples and you’ll hear yep my
engagement photo and then they come back
to him again did you shut those picture
with this thing yeah I did yeah man it’s
not of gears it’s not and making a bike
if I ask you to take a whole wedding
with a cell phone like the iPhone 11
world’s but is that before yeah you can
do amazing with that but the problem
about that and before we begin to
off-track is the last point I want to
make it’s like you have if you’re
shooting for a client telling you just
have to condition them and let them know
that it’s not the year that matters I’m
using this gear because it’s small low
profile we can get through all these
locations and not get hassled plus I can
take amazing pictures with this year
so sometimes they understand that that I
can see that using compact lightweight
stuff at these locations is the solution
because otherwise it will get hassle
with the authorities and securities well
it’s kind of very because I have to kind
of work for that too
thanks for the bridal magazine they have
tips on how did you choose your
photographer you gonna make sure that
they use good gears oh this is a gift
they should be using the shooting so
that kind of gets brainwashed Brides
like oh no no he’s not hot he’s not
holding a standard gears he’s not good
right stuff like that yeah
and that’s how I fix I kiss back then I
still have my own way Nikon full gear
stuff I carry my B same hundred with me
but holding my sewing keep shooting
these are the hardest props this is show
that you’ll actually have good games
like oh no I have this too at the end
the photo speak for themselves
is amazing and that’s where your
spacious starts can clear elaborate
little bit more and photo start so this
is where I start having my own style
before it’s just like capture and just
you know hey around with some action
increase that before and you know do
something but I were walking to the
Louvre and what all this all paintings
Wow they they capture my heart like the
colors we’re talking about this a couple
years ago
I look at the colors the way they
compose the picture looking the way they
pose people to Jordan right yes in my
back then this is way back to me that I
haven’t maybe I haven’t seen enough yet
I feel like how come we have such
technology we have little tiny device
able to capture what the reality is but
we can’t be at the same level as this
yeah I mean there’s no reason why but
it’s just it’s just egg mutation it’s
like nucleus
arts and we stick pictures you don’t
think about this type of arrangement
this type of orientation this type of
post processing the effect that these
four paintings have you don’t connect it
to at least I don’t like when I think
that’s again one reason because we’re
spoil we have a device that able to
capture so we do less
back then all this others or they
happens one pan and again yes yes they
put whatever is on the head onto the
canvas
oh yeah as photographer we haven’t done
that we only look like a button and
capture what’s in front of us
yeah and we get lazy I think and even if
you add lights and stuff and you think
you’re going above in you’re on that’s
nothing compared to that days weeks
months at least these artists with back
that time it’s amazing the attack that
could capture a moment and whatever in
Philips that capture in film and we use
in long lasting that’s good as far as we
come here now with digital age digital
technology we could do way more Weis all
right look exactly like you said now
that 90% of the other configuration is
done for you in other settings and auto
white balance and everything is on focus
to you have free time now to be creative
and that’s where you get a point
the industry is booming it’s not like
it’s like not crazy right now but it was
look at that I already can’t predict
that people can’t take picture easy
so through this experience with this
journey of going to Paris I realize one
thing is for my future in my career I
want to do two things one I want to be
able to create images that cannot
capture in camera because that’s easy
people can do that now second is I want
to put all this art into my photo Wow so
that very nice the next slide would be
my current style right now so are you
ready for it
wow that looks great that’s my style off
my Bridal pictures see when I look at
this picture I always think about you
know how back in like maybe ten years
ago maybe seven years ago people would
take wedding pictures from the photos
and take it to like an artist to
actually repaint and come up with some
like this only do that
okay can I have the picture these are
all taken already MA on a campus and
bring it to a painter to put things on
top of the campus so you become a hybrid
it’s like a photo painting right right I
think that has like another layer to
like how special the photo is right
because you have the moment and then you
go one extra step to make it a painting
and it’s it’s very artistic you can hang
up the wall and people won’t just say oh
that’s a picture but now it’s like a
canvas art right so I can see the value
so basically you’re taking a digital
photo and you’re adding a ton of value
when you make it a canvas so basically I
kind of learn more with the lighting but
not at the visual lighting it’s natural
lighting how lighting should like a
person and then I took a lot of polar
nning the classic closings because with
this type of fine art you have to have a
classic posting and a custom lighting to
match it to get a whole shooting yeah
this gel blue gel yellow gel with gel in
the picture like this it doesn’t work
right
no it well it’s a very different effect
what you’re going for here is very
artistic very rustic look and it’s very
elegant I love how you post a couple I
love how you use a simple corner of the
room like actually tell me a little
story about like this picture where was
this here there’s the column the only
reason I put in a row because if you
notice see some of this picture that use
window light see that yeah there yeah we
know light mm-hmm there we know I saw a
lot of changing portrait they use a
window light so me if I ever found a
window or open my sauce like this I will
use it regardless I don’t even use flash
don’t need to because that’s the most
beautiful thing there is
the corner slide that’s why I put in a
corner and this is a couple death from
Hong Kong and they want to have their
photograph taken in Venice yeah
so we did a consultation about like how
they how they don’t want a photo because
when they approached me they know they
won’t find out picture like this cuz
that’s my style
and then we talked a little bit so do
they want just do outdoor only or do
they just want some you know when you go
to Venice you have to take those gondola
pictures right right so you think of my
way you go it one more they want
something more like vintage so I say
well stops a hotel how about if we went
some Italy a fish you know apartment
like this so we could do more photo
shoot in there because you know they
have other artistic ventures in there
already it looks perfect it looks like
thinking solely through the king of
searching and will find this apartment
this is like a 200 years old apartment
and then wow wow it’s pretty cool so
once I woke us up this is perfect this
is like living in the painting and you
you actually took that to heart and you
made it into a painting oh yeah this
looks fantastic
I mean long will you see the crack in
the ceiling all that anyone we touch and
there’s a teammate in there all the
third on the Russ keep it all there
and I guess one thing that a lot of
photographers always have an issue with
or difficulty I should say is posing a
couple like these people our wedding our
pre-wedding or wedding couples they’re
not models right so how did you actually
pose them and what kind of guy do you
have to talk to the couple’s there’s
some some people are 3d for Jennings
they you know they could be like models
butts like I have in this case legume
it’s not modeling of a client they’re
not model they’re not good
infront of camera yeah to minimums just
we want two things the guy looks like a
guy yes the men don’t like a women okay
so how how do you that okay so I always
keep something this is to thing that the
man don’t know what you do how they
stand
where they put their hands so in this
case that’s what never went understand
just steal our chairs they feel more
comfortable give them a comfort zone
sitting that is giving them comfort
okay now they hands like okay just put
your hand there on your knee
you’re gonna excite Lee tell them where
to put it otherwise it would look weird
it were like okay you can’t do that so
and then one thing about lighting is
always have their subject look to the
light so I have the window yes always if
you look the other way I mean look wait
now I have my lighting here I sort of
light look at it if I that way my
favorite horror movie so we don’t want
that so let’s say why not they’re really
personal might not face yep and
basically as a traditional married
couple
the guy would be solid become you know
Foundation and for the family the women
basic we love him so that’s why I’m
trying to pray here helping the bride
leaning on him having him as a support
hmm and then one thing is a lot of
people miss is that on the posing it was
just for the hands now her pose her arms
action behind her shoulders yes a lot of
time that they will have people put
their hand behind a man which yeah in
this portraiture you’ll be missing a
hand I’m actually yeah you’ll wrap it
around yeah the man yeah I’m around so
in this case I have her hand put it back
in the funds so we see both for hands in
the picture it wouldn’t be more pleasing
you can’t tell right now but imagine
imagine have photo that her head is her
arm it’s not their hidden you let me see
one arm but I mean you look at me wait
out I got one now it looks real right
yeah yeah yeah I can see that it was
that inspiration coming from like the
artists paintings or is that just for
experience that is the cause of
portraiture look if you go back portrait
that’s the way to go I’m not talk about
kernan current-day portrait the old
studio day portrait you know have you
been a high school you know sit down
turn this way and yeah others that car
yes of the old classic portrait oh yes
oh yeah remember those doors
it was torture to take those high school
it was but then if but then I was
surprised because I wasn’t racing my
freaking back yeah it looks pretty good
the end yeah it looks all right but what
you did with this photo like you you
took that to the next level by combining
them and using the window light and
having them interact with the elements
around them it’s just very very the high
school picture we talking about we only
do like a father child yeah
what how you treat your body down there
I’m talking a full body here the whole
body the whole person has looked good so
this is your style I love it I love it
this looks amazing what else you have
oh wow this love this smell to it
also what is window light yes I noticed
that right away then the light coming in
is so soft
now you do a lot of this you’re
processing did you enhance that light or
is that just really the natural I know
we did of natural light she’s nice way
to go I guess but see even when your
light is normally very harsh the light
is just so soft I find it hard to
believe it has no life well for this
case they have this afine kind of not
transparent but white sheet in front of
the window it yeah the user yeah that’s
good yeah that’s a good point yeah I
forgot what the call but you’re right
there how her face on it yeah the shadow
looks quite um soft here oh I have
amazingly soft like I’ll do you see my
laser pointer yeah hahaha see why there
a coffee table look at the shadow there
are soft so that’s how that turned out
to be I mean I I mean I know flash on
how you splash but then if I could able
use natural light I will use natural
light so the again I’m coming back to
like the lighting is amazing is so soft
so beautiful using when you’re like now
lighting is one thing but posing is
another like where do you get your
inspiration for these type of poses my
inspiration is about storytelling cuz in
a picture unless you’re doing as high
edgy you know how this quality like that
right what tasks are we imagine what
when you look at that pose what is she –
in its
is this fashion now we gotta explain to
normal P what are you doing so maybe
there’s no reason that the whole oil
painting like yes key point about
everything opening is they are telling a
story yes right even a normal
portraiture they put something within
the frame to show K who that person if
that person is a doctor you see
something that doctor equipment next to
the portrait to show whoever’s in this
it’s a ways about storytelling so I
always give them action to do that in
this case she’s reading a book and Mary
Nana but like do you come up with this
inspiration on the day of like while
you’re taking this picture or no thank
you too much really
there’s a book pull this book and I read
the book something really work with the
environment very nice I mean I do that
as a wedding photographer too but like
this is like another level because
you’ve really crammed this is truly I
don’t want I have her is actually
sitting in front of the mirror behind
her and just yeah I play with a hair
yeah it was always an action going on
yeah
we’ve learned that in our wedding
photography too is guiding them to dude
action the tricky part is like how to
freeze the action too so when you shot
this picture
did you actually guide the action about
what the hippies are toting the book
okay so you actually it’s an action but
it’s a frozen action yeah okay
that makes sense because otherwise
you’re stuck doing a lot of things and
it’s hard to get the moment perfect this
is amazing I love your style using that
the natural lighting and old modern
style and the processing on this you can
tell that the house the wall the cat
greenish science don’t know if you know
that’s all that Oh photo it’s kind of
similar but they have yellow in them so
I should add but a bunch of yellow into
the photo to make the look that very
nice cool so here’s this is actually a
wedding day portrait this is a bride in
Spain this is one of the hotel room they
had also using window light and if this
one’s bit different because of Spain you
put European tan to love more
darker and more contrasting picture you
know I don’t even noticed see how this
yeah I’ll talk it more contrasty right
right yeah I love that the focus is like
on her face and not everywhere else
because like modern-day photography it’s
so easy they’re like bring your Stella
Pro light so I had like three of them
right
shine went outside the windows shine one
behind her give her a hair light but you
have one light source but you didn’t
bother to put other light source I can
see that because it just draws my
attention to her and it’s very realistic
it’s very believable I’ve been one one
of the things that people missing when
they learn about posing and lighting is
to these two things goes together the
leaf of you light because you want to
create shadow then you use the shadow to
shape the person so that they don’t
thinner and better yeah and you had like
the curves or you Holly the details of
the dress lighting is very powerful if
you use right way so this is probably
one of the favorites but well not
favorite spot one was father I went in
most cuz everybody want to pick a
picture into the Eiffel Tower right and
I love how they’re so sharp and not what
the Chinese photographers do these days
is it true shallow depth of field
shallow depth of field but here you have
them sharp and at the tower beautifully
in focus – I love this that’s probably
because I the focal like that I use I
use 24 35 or 50 and I’ll go beyond
because if you have an 85 or 7,200 shoot
this you’re the Eiffel Tower pick a
brewery yeah and very big you have the
compression yeah this isn’t my favorite
focal length for this type of I call it
environmental portrait as soon as five
millimeters and that’s with a crop or
without crop is a 3500 335 yeah that’s a
good focal length 10 I tended not shoot
so why there’s so much to worry about
I can see that’s the that’s a difficulty
a little bit it’s all about compositions
you know how to I suppose the picture
yeah I guess I guess that’s my weak
point it’s like the composition isn’t my
strongest point which is why I focus on
the people because it’s easy to get them
in a rule of thirds here I notice
they’re not even
so just bring the center but no it just
don’t have gravitates my attention
yeah there’s nothing else distract them
there’s only two element ash of three
elements in there the couple the stairs
and Eiffel Towers
it is so good so I love this again you
could tell this interaction um it was
kind of slowly raining there that’s why
they have umbrella but you can see that
how the goop is actually holding the
hand of the bright and walking upstairs
there’s an action that’s yes yes yeah it
supposed it’s that and it’s a police
action like you pausing is easier when
you tell they have to do it action
rather or put your hand here put your
look here right you can tell them to
action and then treat their hands and
arms and legs later yeah much better and
they’re already thinking about it cuz
they can’t envision what they’re looking
like is there a what am i doing why my
hands in these positions very cool
love it oh this is a lucky shot this
wonderfully lucky shot this is a proc
yeah it’s one of the garlic in the pork
and they have some I didn’t even know
when I get there they have some pink it
because it there and someone we saw the
actual we’ve finished a photo shoot this
is finished we’re leaving because
they’ll kind of help sunset we saw white
because I oh my god ye we have to take a
picture a white pickup with the Briony
was a chance of that I have not seen it
when a picture out there they had to
bride with the white people yet I have
never either is the only one this is
pretty cool and it’s a big white peacock
and she has a big white dress it’s like
meant to be anymore because we tried to
attract the bird get cause of the Rye
but we have no better you can see her
hand has nothing in it not to China
white cropped up because feet and tail I
mean that’s a bad no no that’s AG photo
but then you know you can’t cut you are
animals you can’t tell me what to do you
can’t police the word but this is great
this is a beautiful moment capture the
true for the journalistic moment but I
still see that you have the artistic
style
still there that the way you
post-process it where’s that we’re
looking for
it’s got the classic art look to it it’s
more like a wedding song type of yeah I
mean I had this cyan the green and the
yellow in the white so that kind of mix
up of that so it can’t cube the female
love it love it very simple style one
hand
what’s this beautiful calcium [ __ ]
classroom yep yep so this is not one
that if you ever been to Rome and cross
him down there then it’s full of people
and you can’t go in cause I’m take
pictures it cuz he just can’t like we
get together and why would you you can’t
see the whole building when you’re
inside yep that’s why we went up a
little bit to a little hill on the side
and that’s back here so boom got half
the costs in the background and a couple
little with it’s a gloomy day so we have
to demo flat on one side you tell ya
what if I can go up this one night one
liked umbrella yes that’s what I bring
to people is your umbrella not a song
yeah Bostick – must you open up whatever
umbrella base that closed it technically
you repeat where it always rank so my
division and that’s up relative you know
I always thought about that but my
photography umbrella doesn’t seal water
I don’t know about you but my
photography white umbrella has a little
bit doesn’t it just help umbrella no I
tried it it did it work so just FYI for
anyone thinking to do a dual purpose I
chest loose an umbrella and a real
umbrella but oh there’s fun works
look at that yeah I wouldn’t just some
what if you want to cover up a little
bit it helps but as emergency yeah it’s
book so many of those ones that’s why I
only buy cheap ones right right yeah and
they fly off it I don’t even I am to my
lifestyle I rather them fly off then
pull while I stand down
but the fact that you have a portable
lighting system with umbrella is genius
because technically a softbox what makes
it so soft is because you have a large
light source right and with umbrella
you’re essentially doing the same thing
you still had that the bouncing part to
get the extra light but essentially you
get the soft large light source so
that’s really what you think that
softbox different than umbrella is that
if you’re in a studio indoor environment
you don’t want the life on the back to
spill back no bounds I forgot about this
but if I’m an outdoor to light is not a
bounce back have enough yellow or
umbrella is the same thing yes you think
about that yeah well the same thing when
you do outdoor yes well I think the
softbox has a small tiny advantage right
because the softbox has a reflective
part behind the flash so it bounces back
that extra light into the picture which
is the umbrella you only get the part
that shoots forward the partner shoots
back you kind of lose right so it’s
minor difference but for portability it
makes absolute sense to use if you are
thinking about using speed light you
know those the 800 or whatever yeah yeah
puts a lot of power there every single
juicer power is something but with a lot
of new flash right now they’re like the
minimum voltage is what 200 or 400 you
have more than power enough to do
whatever you need and we fair enough you
can design your full power and they
recycle way is probably two three
seconds right cool cool yes I love the
architecture I love how you put the fine
art color post process into it I like
the lighting the posing is great they’re
doing a shindig at the moment beautiful
beautiful work big it could be better
but there are we just steep on the
posting utility tossed it but at least
it gets a story up that’s all that
matters
and then this one here is a bright in
macao of all the ways you’ve given this
you showed this one has to me the most
painting like look oh yeah it’s not a
lot of time on it
beautiful and I love the the gradual
brightness of the sky kind of blending
in with the whole light where everything
is bright on the top there and it gets
dark in the bottom so the sky was over
it was over so some of this color I
haven’t painted in I hate this guy was
overexposed he said it’s the sky is more
like this color it’s all I think this
colors okay overcast day yeah overcast
so some of this I actually talked in it
so it’s right ingredients little dodging
bird this is before I don’t and that’s
all right can we play sky but I’ll show
you later
this is ladies a long time ago this is
all photoshop that you didn’t understand
but this is nice I mean I can see how
the original photo is nice but looking
at how you post processes I’ve never
seen your original photo but I can tell
you for sure I love this version much
more that’s awesome if you know this all
her pose don’t this is a good tip if
have you ever shopped someone like in
bright sunlight she’s looking at the Sun
actually yes same time I actually got
another flash to feel her more I have a
flash on this side it’s not like I have
one of those flash this is way back
talked about right so you know remember
I hope you have those full flash that
guy yeah yeah one was free fresh one
free flash bracket yep flash and stairs
I hate it because how do you put the
light stand on the stairs you see how
back here I have a sitting right here
[Music]
she’s always that’s why it all three of
those flashes they’re almost in full
powers very nice you see how bright the
whole thing is right yeah no environment
so does that makes it difficult but but
here’s the thing that for the pose
because she is in direct sunlight and
sink you open your eyes so I have her
put her arm here for what it was elegant
and save happy about a little Sun that’s
clever
but you can’t see the part because if it
blocks the Sun there’s gonna be shadow
on her face no outside though
oh my gosh two small details love it and
then also if you notice here make sure
the arm are not fat down and cover the
body and God got a angle and also just
yeah you have a feature so yes he did
come here to here you can’t make a body
figure yeah
these that yeah plus is it more
interesting to see these arcs and then
you have a natural curve on her back to
see I get a chance and to show you my
composition imposing lectures that talk
about trying move let’s save that for
the next time cuz that’s a good treat to
I love to learn about Sposi
even though I’ve been doing this for ten
years I still I still struggle in posing
and I’m sure a lot well share my
struggles too but let’s see there for
the next video
yep okay I don’t know one which is kind
of new and oh oh nice
I’ve never seen this one before the
reason that I have know that because the
lie was kind of low if you stand up like
with bunny on her face I have heard no
down let’s get this portrait cuz the
light looks good yeah I mean the story
behind all these photos is like it’s one
thing that the full looks great but it’s
interesting to know the story like the
struggles that you had to work around
and once you get this amazing photo in a
way the the difficulties of the
situation helped you create this
masterpiece see it’s very funny
well here so it is pretty
straightforward portrait most of time
you have that one with directions you
see how the light basically cut her face
by Green Show on one side her object
just doing that it’s classic portraiture
lighting and posing that make her half
the size yeah yep the shadows make you
thinner
yep just like how I see your shadow your
face to it helps them in your face yeah
that cool cool love this photo is enough
for a radiance paint with this is a
flamingo dancer mm-hmm so one of those
different type of portrait mm-hmm I
really like the texture of the war and I
found its create a lot of different
color textures and
Wow factura soul and yes she’s got
beautiful eyes so I just want to show
get that one eyes this this photo has so
much going for it like you said the
colors the texture and even the play
with the shadows in the back and of
course she has the eyes and she’s she’s
got this look looking right into the
camera so all these as great elements
I’ll go into one photo it’s like a treat
for my eyes I love this so you want to
know about the tools I use yeah I mean
you shown all these great pictures that
you took to next level by processing
them right so how do you do all this I’m
very curious now all the pictures I take
never look this great so this is the
tools I use I use Photoshop okay I don’t
finish not 4.2 now they’re not so it’s
now are four so there’s three different
stuff first you use to get this effect
so what are the difference between the
software did they work together they do
work separately do you work with this
and then in order honey they kind of
work together they kind of work together
look so let’s talk about each one of
them for example photoshopped the good
thing about Photoshop is it has pixel
level editing my robe cannot do others I
use Photoshop exclusively there’s two
reasons of that one is I’m not that good
with Lightroom because I cannot do what
I wanted to do well that’s why I went up
you cuz that’s all I use it’s like rooms
I might know a thing or two more about
Lightroom II you may be may be thankin
is I start with freaking photoshop 4.0
not cs4 Photoshop four point out well
when I said that in 2007 2006 or
sometimes twelve some five I think gosh
so when I started there’s no they won’t
so I start with all the time and it to
be honest it’s still the most powerful
software’s out there it is yes but it’s
it’s not workflow base which is why a
lot photographers use Lightroom because
you can just go through all the photos
really quick doing simple edits and
corrections is go through will you
we open a photo and float
shop you’re gonna do some work on it I
can tell
and then give it a painting option
because you had the paintbrush and
ultimately you had the multi-layers
option I could do a lot of layers on top
of an image to do a lot of planning
which it comes with a blending option we
could talk about that later but okay you
said the hard thing that Kong about this
is it has steeper learning curve it’s
not that easy to learn extremely hard
like literally I don’t know the details
of how to use Photoshop in all my 10
years of shooting pictures like I still
don’t know you know what I tell my
students about why they keep saying oh
it’s so hot all those all to learn but
if you go through it is with the lecture
that I’ll tell you why one thing is
Photoshop it’s a software that beautiful
not just for photographers 3d artists
use it painter use it architect use now
it’s a multi-platform software meaning
that the tools in there is not just for
photography use that will make sense
because yes you think about that if your
photographers all you need to learn is
the tools in there to help you to work
with your photos mmm
every single tools right so you’re just
overwhelmed with all these tools which
is why it seems like you don’t have you
learn a hundred percent how the Tool
Works before you work on photos oh yeah
they don’t think together you don’t have
to learn how to present how software
works before you can we touch a photo
you don’t that’s an eye opener that’s an
eye opener that’s that’s actually very
very looking at all this Photoshop
tutorial her learn everything a tool
before I start working it know just
learn the stuff that you need to learn
how to get your style and that’s it
right there so cost Deeping steep
learning curve
yep yep definitely agree I mean I don’t
know too much I know a little bit but
I’m looking forward to the rest of
presentation so I could pick up some I
want to be able to pick up some small
tips like we’ll take my floor shop just
a little bit more than where it is now
and I’ll be happy so I’m looking forward
to some tip well unfortunately we leave
it up
space were way now so learn okay stop
but good thing that the Knicks software
well this is why to Photoshop that’s
that’s a ton of layers I mean like I was
gonna say we kind of have layers in
Lightroom but not really because you
have a brush and you can have a couple
layers yeah yeah boom I don’t see that
you could transfer this photo no I wrote
to this in Lightroom no no this is all
shop can achieve yeah yeah this is a
precision tool and a night room is just
like a quick quick and dirty
post-processing this is this is fine
editing yep this is how many layers I
have a one two three four five six seven
eight nine ten eleven twelve thirteen
fourteen fifty three twenty one one
that’s that’s pretty impressive my old
house is pretty for you that’s a lot of
layers the handle and cell approach I’m
like a problem solver type of person
who’s like I don’t I have a plan I know
where I need to go with the photos but I
see something wrong I fix it I see
something more so every single there
might not affect a lot maybe we look at
some of those it might be tossed my mask
yeah exactly so that’s why I have a lot
of layers yeah fair enough fair enough
but I mean like you can also merge
layers to likewise once you get like all
these pieces this is my master file some
of those master file I don’t want so I
could go back and change yeah let me
think like okay layer is non-destructive
and Photoshop is destructive but that’s
because you don’t save a PSD file if you
say yes the file is not instructed yeah
yeah yeah as long as you don’t the merge
the layers that it’s non-destructive
people argue well you know you waste a
lot of storage but not are they how much
do the hard drives right now cheaper for
terabyte drive mm-hmm that’s nuts
that’s this nuts man you think about all
these technology basically erase all
your problems
but you
see a decent-sized computer to run
Photoshop and process all this or maybe
a beefy computer for Photoshop sorry
do you need a beefy computer for
Photoshop like what do you use to power
your footage shop and yes very to kick
off a co-op try in there and put a cube
of Wham
but your computer it’s not like them the
most modern one it’s like 5 years old or
some like that right oh yeah yeah I’ve
said you used 5 to 6 years old ok so
that crews that point is like even
though it can do so much it relative to
today’s technology you don’t need the
top in like a Peter a five-year-old 6
why just litter this is like a 5 no
exactly six years old computers you know
I work with prop sensor images I have a
Fuji XT three big process really fast I
work with full-frame come cameras before
yeah 2 megapixel still pretty fast
forty-two megapixel Wow in a shot with
process pretty fast so I don’t see a
problem yeah yeah and I think I think
that’s the the bottleneck that we don’t
have anymore this technology has
exponentially grown so that even like
like we were talking about that the
simple camera you can buy like a $200
mirrorless camera right now and take
amazing photos you don’t need to spend a
lot it’s just same with the computers
like you can use a six year old computer
as long as you know how to use Photoshop
and manipulate you can get amazing
pictures like what you have here right
is it reality is nothing we have more
than enough technology to help us create
yes we don’t need to buy more years
let’s just create as long as we’re not
lazy about it right because all the
technology like you said allows us to be
lazy and not think because it’s so easy
just take a picture at the moment or
take five and you get one good one there
you go yeah I get it does people say oh
I can’t spend so much time on a picture
like this I write a photographer because
for my wedding picture if I do waiting
day I go Lightroom too because the
Kalamata is amazing
just finish one photo so that all the
same lighting pictures synchronize boom
done yep just waiting picture that’s it
it’s more like event but then you always
have couple ones that is your special
babies they’ll be after which is your
portfolio you want spend more time and
make it look good impose on your website
yeah and I think there’s value in it for
wedding too because you can have
packages where you say there’s five
artistic premium photos that you can
deliver and throughout the day you’ll
pick the five where you let them pick
the five where you would turn the
picture into a masterpiece or you can do
what I do if you can able to produce
something about you know other people
can write yes so my deal is that you
know how when a photographer upsold four
albums a photo yes right yep pages like
that
I don’t do that I let them you want to
buy album by it you know about fine
but I upsell on images I charge $150
extra curve single image I would pay
that I mean you see not only it’s the
time you put into it but it’s also the
artistic yeah I think that I’m worth to
business because look at this I spent a
lot um how I pose pose pose an image so
of course of course and and just like
anything else like you you by painting
it cost hundreds of dollars because
there’s value added and just because
this is all digital doesn’t mean there’s
no value added there’s time and
creativity and experience that you put
into a phone like this so again that’s
the tip that you can make your photos
better by pushing it an extra level up
processing it digitally to turn a simple
photo into a piece of fine art that time
you’re preaching on this concept of
post-processing and make your image
better and different right because the
marketing and branding basically a
brilliant you you can find someone out
there with SEO they can teach you or
actually help you as your real site but
when everything you know as a bright as
a clients they shop around yeah when
they Steve ten photographers okay so
okay so your market is so good your poor
folk got up to see the work like and see
you now okay yes
ix even photographer which yes has the
same style as you do guess what the
Klein would look at Nick’s beside your
four eyes prize sadly that become a
prize war
yeah now but imagine this okay if you
don’t want it your wonderful tog refers
and all the other nine photographer has
the same stuff and then you stand up
okay your dish no there’s no reason to
price war because you’re a whole
different league there’s Nick okay you
have none other people have and then yes
you open the pricier but if the client
wants something exclusive they will go
for you and that’s definitely worth the
premium it’s a tangible premium you can
see like I can I’ll have to defend the
other nine photographers because they
might have better customer service they
might have like a portfolio of like
different places that the clients been
to they might have a better website they
might have a personality built into
their branding so they have other things
too but the most tangible thing you see
right away when you look at a website is
Wow these photos are different this is
the Bay Bridge Bay Area bridge but the
way Jeremy takes it it looks like a
piece of art I can see so much value in
that and that’s definitely how you can
add value to your digital photography
step up the game to the next level be
different from all the rest for sure
what’s doing business why the whole
marketing branding is important because
you know it’s business but yeah I mean
photography business the reason I could
be in business I could other pieces that
can make you money but you know I mean
photographers have meaning that I like
photography and I won’t do the best I
could
so sure I try to do the best I could
yeah and this is something you can be
proud of too like you can spend a couple
hours and they say it’s like dang I took
this photo and I made it like this and
this is you can’t do this without the
combination of your deposing the
lighting taking the picture then put it
into Photoshop or any of the tools you
use and it post-processing
with creativity with experience with
artistic background it’s a product
you’re producing a beautiful product
something to be really proud of for sure
for sure you know I I love it so much
that
when I process I put my headphone
because you know I don’t want to Lao and
right really I have a rock music on
that’s my process anything as per hours
on it and then once I’m done I should
stand up jump up and stop dancing oh
yeah yeah that’s how he said it I get
when I finish the image oh yeah I could
totally totally see that well done this
example here she’s an amazing one two
friends call me a weirdo because they
all they hate it for post-processing
they all sauce it because they don’t
want do any mean this is what keep more
shooting but the other way around
I’m actually excited bring the image
back home insta processing I mean to
each their own I think this is a special
gift and skill that you have to add once
been a lot didn’t know about my back
wrapping you know I told you about it is
I was a full retouch at first before I
am out for however that’s probably why
and and if if those other photographers
are all the same then that’s a problem
they need to fix too because
fine you could be with the crowd but
then when is time for the bride to pick
you as a photographer like you say it’s
gonna be a price war unless you can
stand out from the rest somehow this is
one way you can stand out and this is
something I can see definitely well know
what this picture will move on this is
like a personal project but still the
time and effort into making the picture
what it is
so yeah let’s move let’s say in this
picture and get back to like the wedding
theme or the preacher theme just before
and after oh this is a before picture
yeah and this is the after so we move
all the junk in about in the wall and
put some gestures and fine-tune some
contrast and Lighting’s in there to make
it more yeah II so just a rough estimate
how long did it take you to do post
processing I’ll say four or five hours I
think cuz I took my time it’s not the
one fool for it flow it’s a war like try
an air time oh this doesn’t work let’s
try this these little words try that
right right yes that’s where you become
an artist
well that’s it’s this is creating
because it’s a personal project but of
course it’s for work and for Bridal I
mean there’s you know why going for
private is happy assisting you know
yeah making sure the person looks pretty
so we have a guy right there but when
you’re doing something I will do this is
like random and they just have to figure
stuff up
fair enough that’s good let’s go hello
Oh what sigh and then it mixed up where
this really helps is lumina 4.2 it’s
actually mana for this but the newest
version is 4.2 what about it is the AI
assistant editing it has a computer AI
in there to help you you know how when
you you have to go at just a photo go
exposure white balance contrast
yep so I’m gonna have one bar for you
it’s called AI just click that and you
let the computer yeah colleges image
glades okay but it’s always been an
option even since like ten years ago but
a I used to not be good because it might
just do a random preset and it’ll look
terrible like well you know what is not
good back that because they are weak
white data now that we have enough data
to basically tell me I would be even
what your iPhone have that right series
and a Google they all right all that now
data is a new money yeah I mean it’s a
combination machine learning and
artificial intelligent right because you
can build AI with simple logic if it’s
too dark turn it bright but then they
have to compare it to like all the other
thousands and millions of scenes they’ve
done just like okay well in this
situation this is bright because it’s
it’s the background but you want to keep
that exposed properly so it uses all
that knowledge and pills and I work
close they look this company the company
that created them not 4.2 is Costigan
I’m sorry sky them actually what they
were with a lot of professional
photographers to to ask these people
like how do you see photos how do you
you know they know how every single fold
professional photo in the photo that’s
how they create right right and that
makes sense because you want to make
sure you interact with all your your
your resources that you’re gathering
data in to get a variety of samples from
different photographers different styles
of photography and kind of collaborating
all that so when you click on that one
but it’s pretty much a web but it fits
all right no matter what your style is
it’s gonna do its best based on all this
information it has to make the best
photo so of course it’s not hundred
percent but as this sounds like what
you’re telling me it gets you really
really far right oh yeah because to be
honest when they first introduced this
and then I was playing around the
software it’s it’s freaking me out cuz
you know that’s a retoucher I feel like
I’m speaking to fading others you know
you replace me that’s like over a I is
taking over it got me a little bit
worried there and then the introduced AI
sky replacement and poor to retouch kill
you then it’s taking so much time and
tell you so you can look at you’re
looking at the price the bright side
yeah so it helps iran-us care of it I
could work with it and create more
photography right allow me not to worry
about the technical and I could create
it and now because all the Guam works
you know it’s good scheme retouching and
then we pay to get those as one works
yeah he’s masking something out so you
can cut the sky yeah and I can focus
more on making the picture looks amazing
or do more me like instead of like not
be observing z– now you can take like
process and you can probably I’m gonna
mouth it’s all her works kind of like
how Lightroom is it has its own library
it could be you could do photo
management let’s say you’ve already
there
you came on photo with all the
processing you can sing all that to all
the photo in the photo
what is it good this is this because
it’s AI right it’s it’s smarter than
like we miss like you just saw that my
room because let’s say if you finish one
photo in Lightroom okay right put your
exposure to lays 55
okay right we must think these pictures
do all the other pictures it will always
think the exposure to 55 right so unless
your picture is really needed that
exposure adjustment they were it doesn’t
there so cause synchronization a preset
fail right that’s like what
yes that’s that’s why I never liked it
the the synchronization because no right
if you don’t work with the manual
adjustment and you work with AI
adjustment okay right every single
picture you sync it will calculate what
exposure you need rather than a fixed
number right because it uses AI we uses
AI each picture versus doing AI once and
then getting a preset to apply to all
yes right that makes sense I want to
smash into smaller I love that maybe one
day I’ll see you in actually maybe I’ll
try this out I think luminar has a free
reach free trial right yeah they do
about to say yeah I because you work for
them thank you for hooking up our
viewers with the link for a discount
click on the link and then this count
varies but it shows up and you can see
the the before and after it’s pretty
good saving I haven’t use this tool yet
but I’ve seen ways can do and I can’t
not show my hands oh yeah yeah alright
cool there’s some concept you gotta go
back one one side because I’m always
curious about the cons Oh what is the
con the con that to me it has less
retouching tools because I figure that
they want to keep the software simple
they don’t put a lot of features in the
software which also at Polk because
there’s no steep learning curve is easy
to use yes like you don’t get
overwhelmed with too much stuff right so
this software is I would say stuck in
between our Photoshop and Lightroom it’s
a good base for almost everybody who
love photography rather you’re a pro or
you’re just what I have fun with it it’s
perfect the reason it’s all you need to
write you don’t need to have Photoshop
is a low light so software and also
talking for both Adobe and level I mean
Photoshop wave unlettered all be had to
pay monthly one-time then you own a
software but then you get the upgrades
when they upgrade over to me like for
update you get it yeah up quick
you could pay a little bit up wait okay
so but that’s that’s still value because
like holders jobs like voice you want up
we’ll keep using a software yeah yeah
use anymore
no you just have to keep paying and wait
this is crazy too because you say
there’s there’s plugin for a light room
there’s plugin for photoshop and
software once you install software it
will help you install the Punkie each
you both photoshop and label so when you
buy it we say what price it comes out
three or how does that work no no one
one thing when you buy that offer it’s
everything
oh sweet sweet when you light what we
could you could add in photoshop and now
in Douma nah gotcha okay cool cool i
love it and the pros are great the cons
not really kind in my opinion but I
think icon is a pro 2 because for me I
don’t like to be overwhelmed with tools
the colorful you exactly it’s got all
these AI intelligence it’s got the layer
functions which you don’t have my
Lightroom it’s easy to use it’s got the
image management of Lightroom ya know
overwhelmed with with tools I think it’s
a perfect medium for someone like me
that wants to do a little bit more than
the Lightroom workflow but I just can’t
handle a Photoshop yet this is perfect
but let me see a little bit more about
what this can do so this is the
interface you can see it pretty simple
yeah on the right right all that stuff
on the right there
very nice but that’s all the tools you
got mm-hmm you know what why don’t I
just open apps to show you you won’t do
that let’s do that listen I want to see
like let so wow that’s exactly why I
went to solution people laughter yeah
that’s the sky we’ve ended with one
click one click okay
you’re telling me why click but I don’t
believe I’m gonna count how many clicks
I don’t want to click one click to
choose the sky and then get just it you
know you’re not going to ask it right so
ok so it’s still it’s still one
operation it’s not like yet the mass you
have to like feather and you have to
it’s easy
how’s that let’s take a look at it let’s
look at it okay so I’m in Photoshop I’m
gonna use this like pumpkin okay so this
image you can see is this guy’s blowout
right so when I said it’s nice toss up
right there okay guide up somewhere
under filter dome enough for more okay
this is where your six year old computer
starts to bog down yeah a little bit
I mean it takes a lot of time the lower
I know it is knows everything pretty
quickly stand on it’s pretty smooth when
it solo nice Dara see cool sky load up
all those robots doing the artificial
intelligence so they basically this new
solver they can’t Carol eyes for
features one essentials your creative
portraiture and professionals okay
so understand show you can see there’s
light which way you can’t you all the
white balance exposure they have
something a smart contrast is pretty
good it won’t make your picture too too
hard highlight shadow and then you go
advanced setting you got a curve and all
that questioning thinking me like that
yeah that’s a lot of retouching tools if
you ask me then there’s a I okay so
basically yeah does all all that up
there in the light so if I use you see
basically it’s just picking what need to
be done contrast pioneers color
oh you can you can have like a gradual a
I it sound like it one a I that’s it but
you can gradually fade in how much of
the AI effective one so they’re scooping
about something it’s I think like that
too let’s say if I want and has a bit
more right how it is to AI but you see
how to ski in garlic cut more orangey of
course you applied it you can always
your have a massive brush it out
oh yeah yeah exactly that’s kind of what
I do in Lightroom too but it’s cool
that’s although basically for pretty
easy to use right yep now but we’re not
playing with that whip it was something
even far more interesting so we go
ai looks great that’s good creative and
then we go into AI sky replacement
alright in this class caelum this guy
died there so basically their options
they have built in sky for they choose
for time get down a more newest guy from
their website or if you have your own
sky picture you know that too oh wow
very cool so if example with this let’s
change it to a BAM
holy what that’s crazy
you didn’t even need to mask out
anything it just picks out the sky it
literally knew what that is it’s crazy
because even your mountains in the
background like right behind the bride
there’s there’s Gradius to it it doesn’t
get confused what part is the sky and
what part is the mountains that’s
incredible
and it also applied a gradient on them
to to make it to be nice you see how I
hear this happen
[Music]
it basically help using the skies color
to white yo I’m gone scenes so I could
turn Ryan it’s be more clear yes so that
is one thing that a lot of people don’t
do while David we play sky is the sky
color and your fun ground color has to
match it should realistic about that for
you yeah and it’s so so efficient fast
because I can see where like when you
took that relight seam down to zero
it looks photoshopped it looks
unbelievable but when you actually
brought in some of the color from the
sky each the picture it completes it it
just it just makes it look like so I’m
done
this is can I reach another way if you
want yep oh you feel this guy is not to
believe or you can always change you’re
something else you know that’s a little
bit too much for the future that’s to
watch oh well you can go pretty crazy
but oh that looks nice I love that looks
nice right
it’s basically thinking but warmness
into the form
– so livable wait wait I think I saw an
airplane waiting on the dad play here
yeah they’ve tried to be crazy about it
that’s pretty goofy but it’s so great I
love this like you see how I like some
of those because each picture is
different is someone where yeah just
right so they have a closing edge you
can adjust it so that it looks more
perfect
yes man this tool we not only will it
save me a lot of time it will allow me
to do this type of work normally I
wouldn’t touch just because never why I
don’t have the time and never to I don’t
have the skill set oh they add this
evening in a new 4.2 m/s for your Hayes
so here was the light white wheel
ice-cream yummy how it basically we like
the foie gras yeah but atmosphere Hayes
basically tune down your cloud back to
you where the fungi is so you can have
the white balance oh yeah it’s like the
opposite effect yeah you do know the
temperature sky being more sunset I make
it bright on the sky you know talking
the sky you know how do what you like it
I all these tools that you use this is
to me not retouching like in the
traditional sense this is like quickly
that when I don’t play with those I
advanced to be a long time yeah this
this can make me as good as you by just
using this slider will you please
picture out there
nowaday well we’re not all day but oh
all day long is the sky you have a
dramatic sky just become amazing already
know that’s this one wherever I go –
like a photo shoot and we have amazing
sunsets like this photo shoot you can’t
go wrong right takes is straight out of
JPEG right just like that is clean clean
but this guy’s well and now just this
that just transform is like a mediocre
picture to like a perfect high a
professional wedding photography picture
right it’s really good that looks really
good man so let me apply that and just
call it done so now now it saves it as a
JPEG no it will shout out to it
the layers layer so you’re still not
destructive it is actually about to quit
it’s a layer but you know oh that’s what
okay so normally it would create another
layer yeah
Nami awit I just forgot you have no
layer then you can like even mask out
the people more or you can yeah yeah
exactly
gradually I could get more done with
radiation I’m here just well for this
I’m gonna quickly show you this guy we
play some which i think is put it on the
damn amazing well you did it you didn’t
keep your promise of one click but you
did demonstrate if I go up here and go
here and one click yeah open stop I give
you a lot of props because I give Scylla
and move around for a lot of props
because this is a tool that I think a
lot photographers will really love
because there’s a lot of tools out there
that are gimmicky and they’ll say
they’ll do certain things but you have
to have the right picture to make it
work this I can see it worked in so many
different variety because of the AI it
doesn’t need a picture to be exactly the
way that the software is designed to
work about they can pick any picture and
crop out the sky and really do its magic
so it’s not thing that’s exact color I
calculate so it works with a lot of
different power to your pictures right
right like I know I know some stock for
development so will you tell will you
tell me about AI machine learning and
all that it makes a lot of sense and I
think I can see how is so applicable to
this and I’m surprised no one’s done it
before my even more selling on an idea
of it’s not a technique because in
camera techniques the cameras I’ll help
you take care of it in those processes
and look at scale up it’s doing of it it
become your creative any concept of what
you want to put out on pictures being a
photographer
right so now it’s like do you do you
want the blue sky or you or the sunset
sky what does a bridegroom want to go
for what’s more believable yeah so now
you have the you can you have time now
to be a creative professional instead of
doing the grunt work this is great it’s
okay moving on well was I are you back
to the presentation I think we were at
the pros and cons of Scylla
see there you go yep yep okay so that’s
before not yeah see again picture that’s
a little different picture than they
want you demoed on but very similar
right assume was the same set of photo
but in a doc agent but you can see that
the sunset got on it at sea to see how
that you relight it
yes the relighting is really cool and
the fact that it is literally one click
because you just picked the sky and it
automatically figured out a relight for
you so basically is we serve the setting
that I’ve done in the last picture okay
so but most of time when you adjust
where you know all the gap for a full is
yeah and then we lightning it almost
make you a simile of you you know same
photographer most of time is similar so
basically we use just small minor
adjustment and you you did I I guess I
would depend on like your depth of field
too because the edges might be more or
less defined but that’s why I have to be
focused option that you could he focuses
got a little bit it blends in with the
blurriness of your shallow depth of
field you know in your case because I
know as your photography is very sharp
so that’s why you like the Sharks guy
I’m shooting like you can tell is shop
here it shouldn’t this boat is having
the mountain so basically this guy
should be shop – yeah f-16 yeah this
pretty it’s pretty cool very nice okay
so the first short word I use is called
snap I for only used it to turn my image
into a painting that’s what we did touch
on yet because you talked about the
basic Photoshop the masking and all that
you talked about the sky replacement but
this is the part where you make it turn
into the paintings of those
pictures me so much earlier right okay
cool
so that’s the solvers
you have a choice of choosing how all
this different style of art you want to
turn your phone into and you got right
so this is this is so this is similar to
Lumina four-way it’s a plug-in to
photoshop or yeah it’s a pumpkin it
could be a standalone program as well
okay and also a Lightroom plug-in as
well a lot of salt software now today
they are standalone but at the same time
they built in in Photoshop because
follow up become the mainstream of
everything okay but how about Lightroom
does it have a we can right-click and
open and I testify that with label yeah
okay maybe couldn’t at least Photoshop
and standalone right huh cool very cool
oh that’s the original image yep all
your painting
yep that’s after wow that looks really
really cool oh yeah my finger went too
fast so the software is pretty easy to
use it is it’s under median skin yeah
for Hayley’s skin so the company is
called alien skin is called when I
change the name now they change name to
exposure now exposure okay I like a snap
are a little better because it’s not
really exposure changing you’re making
it a painting you’re making an art so
you can play around with it I your time
I use oil painting watercolor right yep
and then they had crayon I never use
crayon I don’t know how to use crayons
like a quick picture that’s your kid
pretty soon all hanging you your life
and then there is a Pinker
oh it’s rainy
yeah but most of time I just used oil
paint and stay with this so the way to
play around with this is that you can
play with your brush sizes so
it’s object it depends on which style
you use so our painting is about paying
so much and then photorealism is how
will you want to follow to be more like
a painting see more or less detail yep
nice very cool all right
Fitness is how much you put the ink on
the pink onto the campus Flickr at the
price right so it effect a little bit on
the fitness so if I go all the way
Tuesday zero you see how some of those
spot spots parking because there’s no
gang on the campus you can white yep so
if you want like really like oil
painting like you get that – yep yep in
this case I suppose I can so you know go
brush last right like it’s a style of
how they worship oh very cool some of
those paint you see how it adds
different house in there yeah it did
yeah yeah it did it just makes it more
like like when you we paint and you have
to mix colors together and your brushes
have like the dominant paint colors when
you’re mixing it it’s perfect it’s
really realistic so at some point that
you have no idea what you’re trying to
do you could do it like you know when
don’t brush and let them pick for you
well sometimes you you want some
different variety to just cook a couple
of times and gives you some ideas so I
probably don’t put that much too much
there yeah in this case there is kind of
Martinez into the faces right so do you
know about this you can also create mass
masses I’ll check out so they look they
won’t look too many and I the math you
can we adjust their a sign and say I
want more fall ISM smaller brush last
peak last Macedon so that area that I
mask will become more follow than a
painting see so that that’s pretty
awesome but I noticed you just kind of
mash them like really quick is that
normally how you would do your work – or
you’re just doing it really quick for
the
you know yet but the one thing about
when I do find out stuff I don’t have to
you have complete masks because it’s all
window the Messier that’s the better
you want some good attention can’t get
in and out of the subjects yeah well let
me says because that’s alright visit the
virtual I mean look at you look Catholic
and not authentic saves you time and
looks better wait wait love it
so this is let my for that’s how I
before I have this software I have to go
in Photoshop and apply a different
texture onto image to make that look now
yes how you saw you don’t Betty that
triangle guy picture you tell me yes I
have on there very cool and then this
one you can also input your own texture
or if you import your own choice of
texture the texture is down here okay
preset yep I have some presets I believe
you can also hold on nope I think this
is all preset there’s they have a bunch
person you can always go back to your
old school you have to have mine here
about yeah so right it’s pretty poor so
nice okay it sorry go ahead
no worries and texture is pretty basic
thing you can apply even Photoshop right
because oh yeah just math on your object
and then put like a texture on and then
you can increase how deep the texture is
or how light it is yes so but then again
with all these tools okay
yeah no you see the AI basically do
everything that’s really thing that US
photographer had to learn it about color
always back to the primary basics
eyebrow basic is color is econ true
emotions yes I don’t care how small your
AI is it has no emotions only you do so
you have to control the colors and how
your pictures affect your realist
emotions that’s on your ID that’s on so
they can’t see
love in the picture or they can’t see
the door or like that the aggressiveness
of the fighters right a I can’t figure
it out but this is where your artistic
comes in it’s like okay I want to make
this picture very romantic I wanna make
this picture look very scary why one
doesn’t make this picture look intense
and those are the colors that you pick
because that’s how you portray your
scene okay before we go further we have
to clear on what does color Corrections
and color grading they are different
most people know that they I was a 99%
that people are using doing is color
correction not color grading really okay
so this is definition of all of this
color correction is adjusting to correct
problem with the photo okay you know
basically under it over exposures the
color cast and also wipe out issues just
fixing problem okay that’s what we do in
Lightroom pretty much pretty much color
grading is different how painting is my
point
artistic you are using color into your
photo but ya got a concept yeah yeah I
feel like I’m definitely more of the
color correction just because that’s all
I do I do it the over expose under
expose corruption I do like the color
cast which is the white balance or make
it a little bit more magenta or agreed
but I really don’t do the more in depth
color gradient which is like the stuff
that I’ve been seeing in some of your
photos where you really just kind of
have a more artistic look to the results
but I let you see interesting seeing
some examples to clarify my
understanding so color Corrections right
right right so this is me so for some
reason if you put your camera in also
white balance at some point when the
sensor sends something else you can
change your way bonds like crazy right
so like that but because of raw file
basically when you take a raw file it
contain aw boy bars on exposure and love
technology right
I never shoot on JPEG piss together that
or even though it doesn’t have in there
right I can always adjust it using the
white balance bar yep
oops and where’s my pointer Hey so you
could use a white balance bar getting
warmer cooler or using exposure
highlight you think that that’s easy
right that so correction but that’s
really what I do and I think that’s the
that’s the minimal that a photographer
has to do and it just makes the photo
much better already just getting it
correctly white balance and fixing the
exposure so it’s perfect so I mean this
is a word case I mean most of time it
will work but sometimes at nighttime
that’s a you flash and you did not put a
CTO gel your flash right hey you got
that CTO is color temperature orange
right and that’s where you want to do
the color correction and make sure that
it looks yep like that before yeah a
correction that’s all I do it’s like you
confirm that’s what I do in Lightroom
and that’s all I do to all my photos
okay
color grading is a bit different this is
well a lot people do it differently this
is how I use color gratings okay I use
it one I want to stand out my main
subject from the background okay this is
a clear separation
yes separations and I want to create
mood by using certain colors in a photo
okay
right and I want to create personalized
a tasting photo style that’s how I use
colic waiting
alright fair enough yeah every time you
wanted use of publish and do something
you can have a purpose right that’s my
purpose right so for this besides I must
refine a lower you know I can’t play
anymore I had to you know we should get
a round of Street Fighter 5 and for the
five before I wish I could I just really
I my cell I mean I could buy myself PC
one in that yeah did you can get on
stream and we can have a good fight
we’ll have some fun
we will see what I’m counting way that
we have a lot of time so we’ll see we
have time I was thinking about
ps4 but their PS fives coming out so I
don’t know about you really buy a ps4
right now wait wait for the price to go
down and buy the ps4 because it has
three four five and as all we care about
yeah but straight like you coming out to
[Music]
okay lack to this photo okay this is a
very example because if you look at this
background it’s so busy so many colors
so many things going on
right alright as you never lost the tube
main character in the front no you don’t
it’s interesting because normally to get
this kind of separation I usually have
to shoot shallow depth-of-field so
everything is blurred out but here your
background is actually really sharp and
it’s vibrant in color yet you’re right I
still can see the people like the
domaine fighters this is focus because
the color luminosity of the subject and
the backgrounds are different that’s
create a separation there like more
bolder colors it looks like do you know
how I learn all this is when I stopped
picking jobs for pre-wedding gigs not
waiting waiting job you want to because
you have a lot of gas around so you want
to burn out and separate your bride home
you know all this crazy environment but
right if you waiting is so different
let’s see if those pictures that I have
before when they go to Paris and they
want to see the Eiffel Towers you guys
today with 85 or 200 yes I bring the
avatar close and next alone out but all
blurry right
so and also and this is why I learned
how do I get my subject more concentrate
in the fund that you can focus on while
the background still see a lot of
details but not overpower the subject
yes because the background tell us a
story and you want the background to be
a focus if whether they’re in France or
in Paris you wanna see the landmark it
clarity because it’s a pencil any child
you realize just a painting things that
you look at all our payment they’ll do
the same thing yeah busy busy but
they’re tuned of the color of difference
so they have the separation oh wow that
blows my mind it’s the color gradient
the color mood I have two feet is that
like couple hundred two hundred fifty
six different great we’re right so I had
to write this way compared to the most
pastel wet when you brother together
which is more set up of course a bright
red right same thing alright here we
have red in the back right right
see come on yeah right different it’s
the end huh
yes very interesting Wow okay cuz before
I always thought the way you could
separate the back of my sis make it
blurry but this is like a whole
different category of separation is my
colors not now that the background is
black and white and the people are color
their everything’s in color but it’s the
luminosity of the colors right and the
cool thing is it’s not that hard to do
this there’s actually tools in Photoshop
allow me to do this easy really I never
I never thought about anything like this
I never really knew what to seek out and
then a lot of reason for that is for
color grading in this case is if you
look at the left pictures the background
is more to the orange II and yellow
right yes and you look at white one
which are we move bunch of yellow in
orange can you tell the skin tone and
the subject pops more oh yeah it
definitely pops more on the right and
it’s very subtle too like if you didn’t
tell me that you took away the orange I
wouldn’t have noticed but simply by the
fact that just looking at the two
pictures the one on the right just looks
like the people pop up just so much more
but the background it’s not like it’s
blurred out or key focus this is okay if
you look at most my fingers for non oil
painting ones mostly is very my
background is always more to the cooler
side yes the reason is it doesn’t matter
that person’s nationality and skin
colors it’s always lean to the warm tone
and warm right stand up from the coal
right because me has orange a woman told
who cow in the same pictures human I see
warm tone first before close
you know in this case if I tune down the
background to more coal tone my subjects
stand up because the skin tone was
always warm and that’s another subject
yeah the fact that our eyes are always
drawn to orange is something new to me
I’ve always realized that blue and
orange are good opposing colors in the
color wheel so they always stand out in
a pop so not only did it pop but our
eyes are naturally drawn towards the
orange which is some warmth of the skin
as well so well there’s so much
information to take in by just looking
at these two photos and you really
illustrate that point really clearly by
staying at all but it’s there it’s it’s
there yeah very very subtle but it makes
the picture it pops the people I like it
and then for this last either add color
in the photo to create a mood yep this
case it’s just for example wise I mean
if by itself is pretty good already
yeah but then I add more blue into the
dark area you create because she’s there
by herself I want to create a lightness
of a feeling right by adding that blue
casaya nice blue into the dark area it
right in that feel right it’s the mood
the mood part of the the color or the
color is creating motion so here it
looks okay guy grin but then you have
always change the emotion by just
changing the color yep looks good I mean
I like both pictures but whatever mood
you’re portraying that is what color
grading can give you I can see that
effect definitely this picture here when
I create is pre Newman are on creepy
it’s now our four before the shock we
know textures it does a long time so
lumen I could do this with one click to
like this is not sky replacement like
how does no difference uh because no
matter you can also apply textures and
they have in luminous so that’s why it’s
better than Lima because you cannot
import anything and add no any extra
elements into Lightroom but that
so we were talking we were trying to add
texture with snap art earlier but
instead the tool to add texture would be
to use a luminary no Photoshop oh well
for some can do anything but no more but
yeah
Photoshop it’s uh it’s it’s too much for
me I wanted something a little more
streamlined and I think luminar is a
good tool to have a snap snap art is
nice too but I think if I had to choose
between one software to buy I go for who
without first and you’ve had money snap
art second but I think all these both of
those schools well unless you wait why
not then you don’t really need um yeah
but lumina is definitely worth it
I think Luminara is really the key
software that would take my photography
to the next level with literally a click
of a few clicks of a button to get
really high-quality digital processed
photos that extent apart from the rest
of the photographers out there just
using that tool and a little creativity
goes such a long way oh yeah it ease all
the hard work and Guam work for you and
just allow you to use the function to
create actually their slogans release
your creative for these that’s exciting
yeah it makes it easier so you can be
creative you still need to be creative
cuz the AI yeah well actually you don’t
even need to be creative you hit AI
[Laughter]
people be creative
yeah is a free world you allows you to
ever how you already feel like I’m
curious if I batch all my winning
pictures with just AI a try that next
time I think it’ll be interesting anyway
go on so this is the type of car waiting
on the left side this is the original
image you know sunset our little bit
slightly overexposed but use the other
form was in it but now they have the
area we do we meet every time they lie
do we move the yellow and green ish so
it looks like that that’s what it is
and then the skintone bit more like
clear yes so that’s the type of clock
waiting that now that they a lot of
waiting photographer that going for so
what what tool do you use to get this
effect is that just like appreciated um
yeah to be honest personally I hated
this but so most of photographer use
this they are by preset Oh actually yeah
one click together okay yeah I never buy
any actions or preset because I know I
could create my own I create my own this
this is my own preset is that preset
that you can maybe included leap below
to the people in downloading use
everything about that maybe on the next
video not this one teaser for you guys
we might have some presets maybe freebie
for sale I don’t know
Germany is a really generous guy so I’m
nudging him to give it to give it out
for free we’ll see we’ll see
well let me tell you the problem with
the disc a style for this one I tricky
little bit different you see how the can
show that us on top on her it’s beating
yes if you purchase a lot of presets out
there one thing they really do is over
expose everything specially on the white
area and when you have a bright way and
a white broad address that’s my area and
you know how much some of those dress
are like from 5,000 and 10,000 pieces ah
yeah I don’t resident and basically the
reason why they were so much because all
these details in there and I just offer
broke them up and the words other than
is the bridal magazine support that it’s
trendy right the modernize detail
resource what what’s trendy
do you think those details get blown out
because of those presets and because the
precess
don’t have a I in that they just they
just basically don’t have the it’s like
a global thing you know backed I want to
talk about global edit and it’s right
area drinking right into the whole
picture
yeah up onto the whole page
all right right what happened because
because again AI is what allows them to
select out like the sky for example and
put rely on departments not sky and put
texture on the sky versus global you’re
just applying it to everything because
there’s no intelligent to pick out the
person fair enough
cuz and then I kind of see some people
play well with it I try and I said never
purchased those preset or absolutely I
play with someone else computed before
and try to match it back out where I get
a detail back but because they kind of D
to the color evenly massive out in the
sum of wheel it looks fake so there’s no
way that’s the only ways forget the
details that’s that’s the tread maybe
because they could figure it out they
just want to make it easier them and
make it right on shop they’re working
what they like this hostile so you know
this is the photo I took for them for
the catalog so so that’s what I get
hey well in business the client is
always right so if that’s what they’re
looking for you can educate them how
much ever you want but what they want is
what they are willing to pay for if you
can deliver that they’ll pay you that at
the end if it’s a business relationship
you want you’ve got it yeah we’re happy
a man had to eat right we all have to do
that but when you go to like W PPI you
talk to other photographer yet there’s a
whole we you anything yet if it’s not
for to that this is not photography when
I judge I will I was on a judge this is
like infant God out
that’s your photo you just snapped away
I can tell you that 99% just when I see
it is it I don’t see any detail on
address sorry
yeah fair enough cuz this is wit this is
wedding yeah and then there is Fatah via
that means the best thing is when you
have wedding info time together but most
of the time now today people only got
wedding and that’s no photography I did
yeah yeah well it’s business and it
people’s got to eat right so yep make a
client happy
follow the train that works the whole
different boat but the more important
part is you with the tools and your
experience and what you’re showing us
today people can accomplish what they
want you like I can look at this picture
now I know if I detune the yellows and
do certain things with the highlights I
can get this result whereas before when
I looked at the picture I’m like is this
out of camera or is there some
post-processing done so we have the
tools now we have the knowledge we can
now because I’m going for you out that
we go for you because what you can
actually do this in camera now they have
film simulator can actually get this out
in JPEG Oh what yeah wow that’s pretty
cool so one thing that why I love to
Fuji because for Fuji I start shooting
JPEG now because there are film similar
just so great the images come out in
Japan it’s far sharper than raw believe
it or not Wow Fuji you can give yourself
a 64 here 128 kid card you should every
in JPEG at the end of a basic hand as
you got your client here’s your wedding
picture and then you’ve gone you don’t
have in process now just a so much time
I just crease my production values with
the hires people should get live bill
yeah we just you know later in Jay in
the Fuji JPEG yeah I mean picture
because if it’s a bad picture you won’t
click right yes ii thought you won’t
click except if there’s flash and you
can’t you can’t really predict your
flash based on come on
waiting cuz anyone here I mean they go
for those like Napa and outdoor I mean
why do we do flash no flash unless you
try kept your bright background you’re
in the shade so you don’t want to over
expose the background
you still need flash sometimes I mean
it’s the option I’m just saying that
it’s not absolutely the option right
right and and this this color profile
with the JPEG and the Fuji feel that I
talked about is that only unlike the xt4
or does that apply to all the paralyzed
or it has it for all all models I’m
almost like dating what
what would you say like forth imps yeah
but there’s I apply for the older
cameras who only newer cameras coming
out uh I think they have firmware up
wait for all the cameras would they
support their old cameras that’s a good
company nice you know that Fugees
photography department it’s not their
main incomes right I did not know that
yeah what else do they make so basically
they they’re making medicine they are
making that scene that’s yeah they’ve
made a lot of money of that so they’re
in pharmacy Rico but they also have
their you know digital imaging
department that’s why they really really
focus on making that did your product
one of the best they are the one who
come up the one best medium format
camera affordable medium format camera
that’s right I heard about that that’s
pretty impressive
i-i’ve never thought of the day where I
can afford a medium format camera like
you know for the Sony a7 ow is a for a
so now for it costs around 4,000
something full-frame camera yeah Fuji
GFX 50 medium format it only calls
around 5000 ish for medium format yeah
there’s no comparison of course if you
got medium format you gotta get better
lenses to really oh yeah take advantage
of the the the extra information you’re
capturing but that’s a mosaic you know
and face one’s how’s about all those
camera it caused over 10,000 ish of
beyond yes
yeah which is the one bring a medium
format to a horrible level yes yes I am
excited about that anyway yep that’s
cool I got that later
sure so again this is my personal style
thing like a vintage photo yep laughs is
or would you know yep and I think you
told me about its feature that you think
that the left looks pretty more
contrasty yes at some point if you glaze
on the first place
contrast is stand up but yes
you notice you look at the picture
longer you realize that all this in a
war is actually stealing and that stuff
back there is still exam attention away
from the subject oh yes it does and
that’s why I did what I did here this is
kayla has street fighter photo memory
triple yes yeah I ease all this College
has a bad nuts in there except for the
soft yet yes after looking at it for a
while then you really start to see how
they pop out even more and in a nice way
with the picture on the left they do pop
out but the same time the background
pops out – yeah you look focused on the
longer longer than 5 second you were
like yes your eyes got wondering because
it’s so much going on there’s so much to
focus on but here you could still always
focus on the guy and the girl and the
color like you say adds to the mood –
mm-hmm so I mean course you could have
like an 85 this is like I believe this
is got 55 1.42 something but you can
always use a 85 and blur more out but
yep we talked about in we inspire which
one here how far can you go to get this
favor of 85 you got quite a bit to get
that Freddie sometimes you don’t have a
you probably shot them with a 50 and
then with the 50 you don’t get that that
blurriness that you want as much so I
can see how color as a separation that
you need so if you know what this card
trick is save your money on buying those
expensive / that will feel less – yes I
know I still like the the natural
blurriness but this is an extra tool to
have money but this is only by to me
because when I started I’m a pool
photographers I don’t have a lot of
money in finances so I have to find my
work without those so-called expensive
portrait lenses like I say I always see
your struggles help you to make you a
better photographer so this like one
example right there I remember back when
I was in the school for graphic design
one of the instructive you said that
your creative comes out
when your resources is dry yes because
you have to be creative
otherwise nothing work yeah damn what’s
going on there you will be spoil yes
yeah you just you go for the automatic
whatever it looks good on Mandic I’ll do
that I can see that okay so this is one
question that people ask me about you
know yeah okay now I get it
I got a world of colors right where do I
start
right so one thing you know I think one
of the key thing you learn is
complementary colors this is something
fancy the bass plays earlier only and
blue always work together well right
right now
they have tools that help you understand
that you study that okay let’s Apple
here nice choker the movie okay yes yeah
you go on a DS but I would say they only
talk about how great they use the color
in a physical scene in this movie yes so
let’s break it down
this is all the cobbler is in this ya
the scene right right right the cloning
the color the lighting and the gradient
everything now yes this is the color
pick directly out from this picture from
the scene yep if we go in Photoshop they
have a function called OB color theme
Wow okay what yeah you go to photoshop
you go under I’ll show you later I mean
I forgot which one anyway you go in
there and you choose a function car
complementary you see how this five
color comes up let’s say you have picked
this one color which is the jacket of
the Joker’s jacket it’ll come up I’ll
let that say it works well with those
colors oh good right it kind of give you
a starting point what color what color
would kind of give you ideas this is
actually whiney exactly yesterday I was
working on a logo design yesterday and I
was trying to see what colors work with
this palette I wanted to use four
different colors in my logo and I had to
constantly go to like a different
website at Google like color palettes
with green color palettes with purple
but this I think
do a color picker it gives me my color
palette and it’s right in the same
software this is pretty cool
oh you don’t have Photoshop you can
always go to this website here they also
have color wheel it was a zinc right and
then the difference between this and
what I was trying to do yesterday is
that you can pick your starting color
and they’ll give you your other colors
whereas before I was looking at a
collection of palettes I couldn’t really
pick which one was my starting color I
just have to pick which palette I want
right and I’m stuck with one of those
four colors where is this you have a
starting color you pick and they’ll give
you the other colors that look good
together so I would suggest if you want
to learn about color this is a really
good start
very cool don’t look into much into
because color sign itself it’s a whole
different subject that it could be like
a whole
PSDB on its own okay yeah so I was a VAD
bit obvious batch go apart but alright
that’s kind of learn a concept just go
only emotional stuff yeah I mean this is
all really good stuff but for me it
might take away after this this this
this session we’re having here I’m just
gonna get sky Lube living at four and
stop I probably start with Scylla I just
start using the a eyes and then
replacement of the sky and using some
texture I think that would push my
photography or a to next level this is
stuff I’m putting it back on my head for
once I get comfortable with those tools
I think no more in depth with other
standing colors I’ve just seen a little
bits here there and adding to my
palettes of color but all really great
information for sure
all this here is just more like a my
opener it’s not
I’m not telling to go deep into learn
every single right I’ll spray into it
but it can’t open your mind from that
box cuz all this technology sometimes in
track you’re in a box I just can you
open it up and see okay with something
yeah there’s definitely a lot more to it
so AI can’t replace you yet Jeremy you
still have I really control the mood my
way friend touch pictures for a while
[Music]
okay okay uh I got this question asked
all the time in Photoshop mostly like
yep remember I said earlier you don’t
have to learn everything in Photoshop
this is Moses I used to do my we
touching so I’ll use Mac a handful stuff
yeah it’s not I mean one two three four
five six like only six feet to learn how
hot is that right yeah a little bit more
than handful a little bit
well a ice guy who pays me not to learn
that that’s the winner
that’s not a Photoshop I’m just a
Photoshop I say so I use Mac where’s
your snap art where’s your snap art
that’s not one of them that’s something
else that’s like a whole different that
whole thing in extra stuff okay this is
your you see your tool belt of the most
used tools but the snare I think is
mostly my own style which is all a
painting style it doesn’t apply to
everybody the sky it doesn’t apply to
everybody this guy is I can see that’s
so valuable right away that’s a what
monkey stuff where I want to buy right
after this collar yeah so this is what I
do all the time ask your level and curve
the AI sky we plays now you okay so
let’s do color this is nothing to talk
about more black and white control how
to control okay black and white color
control sounds interesting
it’s a paradox we’re talking about
oh yeah Blanding both of layers okay
this is the things that I use in doing
post-processing okay the only bloody
mode of layers I know it starts with the
end it’s called normal
well okay just to be clear I know most
people know what mask is but to be clear
I am Asus imagine you have a transparent
paper on top of the image that you can
do on to hide something from below okay
yeah and in Photoshop you can do
multiple of layers
oh that’s what nathless that’s what a
lot image effect and you know selective
area to fine-tune the tree okay yep a
lot of people use it for a you know
clipping out stuff
no we will figure that grand search that
I’m asked to write I you know this is my
messy mask just you can’t do some hi
dodge and burn here so that area here is
basically is EC where the face of armies
and try pry it a little bit that’s what
that yes yep and if you go into a quick
I think
quick something more I forgot to turn up
of it but you can see your mass in this
area by clicking uh feel Z the bracket
yeah regular circle in it yeah you see
this yeah now then with mass it comes
with two things that you need to know
about one is the global edit and then
the other is selective area creaking
okay yeah global edit is more like you
know this is open in Camera Raw and the
same thing I said live on that’s global
edit whatever you do that affects the
whole feature yeah that’s what will edit
that make sense
Global holy it’s kinda like why I do in
Lightroom it’s just global I can’t
select anything now if you apply that
and you put a mass on top of it and just
open up certain part that become the
Selective area shrieking which is this
yep so you can basically it’s the
eyeball and I just mask all that out and
yes yeah so like if in Lightroom we
definitely can’t do that you can use a
brush and brush certain things onto
certain things but you can’t selectively
apply effect to a mask definitely a
level up in terms of what lightroom feed
you also have you realized if you use
math in lay room its molecular machine
like crazy yeah it does oh my gosh it
does it’s like brushes you keep dudes
brushes and it creates a layer by
brushing but like it’s a capitalism
thing may I’m telling you the whole life
whole thing is ok oh ok we have this
cool function in mask but in order for
you to use mask
get a pay more by by yourself much more
powerful computer before you can use it
yeah yeah yeah but again the suffering
we talked about the luminol for and a
snap are they
have their version masks already when
you apply the texture need snap art or
when you apply the the sky that you can
mass after the the reader realizing if
you don’t get all the software you feel
like home have mass I’m gonna have mass
snap off for a mask you realize that
mass is become a more crucial tools when
it comes to creating every society ask
yes must learn how the math in order to
able to create something out from this
how to alternate how do we place pixels
you need to know that it’s selectively
area tweaking if you only see one solver
has it is fine but when you see also
where has it you know it’s a must right
the trend it’s a train in a good way
because that’s where technology allows
us to manipulate the photo and control
what we want to control hmm and then
level it’s pretty straightforward
yep it’s basically your control your
histogram the great point and the white
point now it also has channels you can
do a lot of wonder with it but this
hoping here is also a global adjustment
but you always yeah that’s on top of it
very myself now a lot of people ask how
I use it and they said I use it very
stupidly if you look at this histogram
here so the black point and a histogram
has this gap yeah here I see it
yep ASCAP meaning that there is no okay
so total for me look number the total
number of this ingredient I mean
histogram is 0 to 255 right oh you had
data in between right meaning someone
that you wasted because that yeah I
think if you learn to shoot with
histogram it will teach you how to do
should I Instagram that looks really
balanced oh yeah well here’s a grand yes
yeah mr. grand that’s balance it’s what
you want to go for I never could get it
because either this guy blows it out or
my shadows too dark I could never get
professor
in digital so yeah okay miss histogram
because a lot of photographers seasonal
photographers and pro they by looking at
histogram
you know how you picture looks like for
example I don’t even need to look at the
picture well now I know that there’s my
little black in this pink immediately on
transfer picture is less yes and then
there’s always look go out just a little
bit not a bunch in somewhere that’s what
I see all right let’s look at a
histogram so meaning that this picture
has the problem is last contrast if I
pull this down here then I could give it
back back and make the contrast pop yes
that’s partially level I’ve actually
never done this before but I guess it’s
up consciously I do it with Lightroom
because there’s a bar so I do this and
look at the picture I look at a picture
the result and then I adjust the
contrast accordingly but I don’t look at
the history Graham I don’t think yeah
the only time I look at history of is if
I’m blowing out the highlights or
nowaday the so-called focus on the
histogram to retouch off-shoot is a
little bit overrated because the style
is all haywire there’s I overexposed
style underexposed style
so yeah just go with the stuff that you
like [ __ ] especially now with the live
you see what you like I think what you
like
I mean learn all this but don’t try buy
all this techniques you know agree let
your mind go free but know the
techniques but you don’t have to apply
the technique to every single fair
enough
alright the next is the curve which is a
more powerful version of a level we’re
still dealing with histogram
same thing except you’re on the line and
you play with a lot of different things
you can control the brightness the
contrast
everything you know occur basically
curve is the master of everything same
thing here you can see how this is the
grammar sync same histogram the same
last one is music II right so yeah I put
this black point go here right I’m a
picture I know more contrasty yes now
this is until I use all the time this is
the tool I use to create other Street
Fighter lo pictures with the phonetic
colors
yes this to a selective color allows you
to go into all this different color from
black neutral weight magenta blue cyan
green yellow and red and go in each
relative color and play around with
really wait you have colors and then
colors of colors what okay so you see
the color here is black yeah yellow yeah
magenta and cyan okay so you know about
seeing what I can’t LGB right yes there
are the same relationship in a way okay
let me go to the next one here this is
perfect that makes sense so right now
you pick black but in the black you’re
changing the signs of the blacks and
magentas so black is contouring how much
black in this photo
so yes okay now all this up there yellow
magenta is I also affect the black yeah
see the number here yeah so I – 44
yellow I’m a zero e6 magenta that’s a
lot away from the black yeah right
that’s why increase the black to 20
nights you get that darker color so what
it does is actually yellow when I –
yellow yeah I increase the cyan so it’s
not something just a subtract something
it’s a bar yes
okay science this is this side if I move
less yellow more cyan say I think knows
a magenta I become more green same thing
in Messiah with monk much more magenta
okay same thing yes so this is allow you
it’s not it’s actually working with a
pixel because a pixel yes you can go in
you know how many time that would take
you anyway take you in definite amount
because you have so many pixels oh is
that basically what they do is every
single pixel color has a color range
right today the color of the pixel yes
to create yep okay so run on it we place
it you just a fix around mess around
with the range color and then get it
different
that you want all right that’s why but I
have a question because this is this is
globally right because you every time
you make this change it affects the
whole no no I came to grow both of my
own the black area right yes and but all
the black area how about if you only
want the black area behind the subject I
guess you can mask it right you can ask
it but at least it helps every city
before we don’t have that you gotta go
in saturation
– saturation that the whole picture is
saturated or desaturate and mess it up
but in this case it helped you one level
up is oh it only outside of that area at
least the bright arrow and the skin tone
one effect this is such a powerful tool
that I’ve never used again
if there’s only six tools that you
really need to know but I never bother
to learn this because there’s so much to
learn I never thought I should learn
this tool because this is actually
applicable to photographers in a way
Lightroom had this too but it’s all in
the color with the saturation and the
luminaires and the hill he never used it
difficult to use because it’s not
isolated it’s a global adjustment thing
so when you mess around with it it
affect too much so yes we’re not using
it yeah wedding photography at least for
our style I try to focus on natural skin
tones so if anything I changes to skin
tones to something it doesn’t look
natural automatically I throw it out
because I don’t have time to make a mask
overexposed read me a picture the bridal
picture the yellows are calm yes this
basically egregious we move the yellow
yeah yeah you can definitely do it here
and then but yeah to bring it back in
her actually being in the in that
picture where you took out the green and
yellow
you still need to do something with the
skin or you just leave it as is the skin
is actually belong to yellow categories
so will we move some yellow and blow up
the yellow stuff to get that look okay
good to know
I mean it took some time but once you
play around with you know which color of
that color in the photos
and the next single thing is is the plan
emo baby
ya see let’s see the first one that’s
the only one I use because I never
understood why all these movies exist
you don’t need any more of them but just
understand you can sell health it has a
line right so each category
this group of category effect talking
this Calgary Leiden this is all
affecting saturations this is
subtraction
there’s only effect color and not
anything else what you understand that
it be easier and if you ever play with
the filters on top of Photoshop yeah a
lot of those field is based on all these
blending mode so that’s how do you
accomplish it interesting way if you
know how to work it you can actually use
the blending mode with layers and not
use the filters know you know you know
how I learned that nope did you see how
those filters being poured have slow
computers you know in fact that when you
try one filters yeah Bala juice and time
or just wait for it to render right so I
have to learn the alternative way how to
run those filter manually to saved you
yeah and that’s how flattening Mo’s Wow
so how do these buddy modes help you now
like how it is helpful for when you’re
branding your skies into the background
young textures when you hear line up
your skins when you want darken certain
area the branding will helps a lot ok
yeah I I can I can understand what
you’re saying but maybe in the next
video we can do like a demonstration to
really Soloff I that
so this graph here basically explain
more about what each I’ll just care
going about granny mode us okay
yeah I think this is a good one for
people to like just stop the video and
take a screenshot of this because this
is this is very handy you have different
modes and like literally English
definition of what they’ll do so right
health
we’ll have to touch her this in another
video like a demonstration way too much
to talk about
I’m already overwhelmed how much more
information you got packed in my head
but I’m learning a lot so far this is
I’m so glad we recorded this because I
think people are gonna watch this
multiple times
I’m gonna watch it multiple times
because they’re very good information
here and you’re very generous to share
all this information and maybe one day
an a I will do all this but right now it
hasn’t been able to so it’s good to know
you go knowledge is meant to share so
yeah it is okay so I talked about Syria
right yes so this is one picture that we
have Charlotte way way way back and
believe it or not this is my first
award-winning picture
Oh me with the aftereffect not not the
way it looks right now this is straight
off yep this is my and that’s all done
with texture it’s all this is a
replacement texture right yeah well you
also relied it her a little bit to blend
with the texture yes
well back then is called brushing they
don’t have the technology we lighting
yet this is that what ten years ago so
you kind of like took a light faint or
jet brushed on top of her mm-hmm
otherwise if you realize if her skin is
still kind of bright it does something
after background she has natural light
imagine that’s actually a wheel wall
right and you have like bouncing on that
that wall color would affect on the
subject as well yeah somehow like back
the other wall or don’t list the room or
the enemies the lights that wall she’s
like her the same way yep so yeah so
that’s why I fell obviously because it
gives me a lot of help me win a lot of
War pictures back then because it’s
different so so with with lumina for you
can do textures like this right yeah you
can and it comes pre-loaded with
textures reloaded and you can also load
your own texture as well so if you
wanted to get texture like where do you
find textures waffle this basically took
when I’m wall
all textures and then says put color on
it and Mitch sometimes it makes a couple
different action plan them together
become a new textures
it’s kind of your best bet there can be
a temperature so yes no I know that
yeah that’s like green screen but yes if
you like to this or you emboss it
definitely I could see a texture very
cool cool I used texture a lot different
way – yeah this scene this time
attention I have in my Photoshop texture
files I got home under yeah hold three
four gig of textures Wow very nice so
like one of one thing I use is that at
some point I’m kind of tired of you know
okay let’s say for the left picture here
there’s three four pictures
yeah it’s too bright and there’s too
much going on is on the corner and
carefully respect to the subject right
so a lot of time we will can’t put like
a vignette so two colors people’s eye
into the subject like vignette it’s
cliche it is because like yeah you think
about it vennett is actually a defect of
photography yeah with your shorts yeah
it’s you can’t even feed the tomorrow
whatever it’s too big
yeah so is offensive too big for your
legs so we’re using the effect on
photography to make art which is okay
but too many people using is becoming
you know like that you say right so I’m
doing you texturized yet meaning using
texture Judea and darken the bright area
so that because most and we do very
light and the white dress is always
stand up it we’re I not look and as well
it’s different yeah I love it
that’s that’s a fantastic tip because I
think I know vignetting but I never use
it because it doesn’t look good but you
just you just created a whole new world
on beginning with texture that’s really
cool that’s that’s a small tip that I
can’t remember to use when I want to
when I want my subject to pop out more
I don’t need to use a vignette but I can
use a vignette in control of the texture
because I’m always focused on two thing
when I create my photos I mean cause
possible is storytelling and believable
we have a net we need art that’s not
believable
no when you have a texture like this for
one it help you relate to oh this is
vintage okay it it’s a story it’s an
image is old yeah the same time it’s
more even out so it could be the dirt it
could be the oval which a lot of rot in
doing so it become more believable then
I’m so called off yet yes this is good
this is this is I love this this is a
tip that I will definitely use if not
out having it back in my head for when I
need this easy but easily put a texture
on top of this photo yeah uses cost soft
light and here’s a massive mess all the
dress make it non authority and that’s
it easy but the concept to think about
it is it’s genius
thank you and then sometime I use it for
because this is a gob apartment area in
Paris and it’s only you can’t see a way
now but all this the wallpaper
wallpapers they’re peeling off really
the yellow you know when you you know
when poor people get all you know you
can’t yell ish and yes oh yes what are
they fixing it or whatever cuz it it’s
you can’t even call it vintage it’s just
oh and broken so point their artistic
old yeah it is oh and we touch it and
make them clean i basically pulling
couple texture the cuff way up and make
it even do it here and get some yes yet
so it’s saving a lot of time
it looks great too time saver yeah and
and a piece of art it looks good yeah to
the point is but I know what I did so I
can’t because it’s just like a lazy the
result is what speaks for itself I love
it
and sometimes if you look at this the
war here basically it was yelling and
because it’s too much going on here like
it takes 2/3 of the picture of this area
so I pretty much for attention make it
look interesting so the picture would
not be that boring
so sometimes cool so you still have a
lot of Titian is subject but Rebecca
it’s not totally clean I like it it’s a
very different twist of using texture
and this one is tricky this is way way
back with this same thing with that
yellow picture it’s I shot this with the
Nikon d300 which is a crop sensor you
know that it’s not full frame so back
then I was a kid yes this is a good dark
talk church so this area right here this
area where I’m circling around and also
back here yeah when I open up in in
Photoshop
when sharp Korean is all messed up or
muddy because there’s no information in
it yes yeah yeah especially when
approximate okay that we see the details
right back there back there with props
and I’m pretty sure with my XT freeway
now when I take same area take a same
picture it way better we’re talking
about portable technology okay yes very
sure so this is you’ve got some really
muddy background still muddy right there
you can see nothing it’s like but it
still looks pretty good and on a digital
platform I know it’s okay but when you
read this out it looks like crap oh crap
oh okay but what I did is that should
mute to notice my texture on the dock
area hey you know the concept of that is
that okay so this is the muddy layer of
those right stuff I put a clean tattoo
on top
blend it together so I created a brand
new clean pixels
yes so the pictures I’ll start having
clean pixels so when the printer when I
send a picture to the printer clinic in
April when do because you know the
pretty it’s not just easy okay let me
send this operator in a printer right
the print is Saturday
so you have to render it yes so the way
that we require to able to eat every
single pixels yes
something they can’t read is the
estimated and they ask way all the
cleaning problem cops are when they have
a gas that made the pixels because it
looks muddy you can see a gradient of
the muddiness suggesting by we adjusting
and putting new pixels in there it allow
the Queen unable with it easier yeah so
I have a much I was a perfect but a much
cleaner image yeah it’s more define like
the pics are deliberately like that
versus like an uncontrollable create of
mud yep
Molly meaning very cool it’s like all
black and yes there’s no you know if you
go up remember the first picture I show
and not to do for that fourteen hundred
percent you see how it’s different but
it was the same white color yes yeah
color of white or gray in it
yes represent yes so stamping goes here
when your body
yep meeting there’s nothing in there
it’s all one color and just yes so when
I act actually in it the texture call it
onto that and create more different type
of pixels in there and allow it to be
better that makes sense
I mean especially for the pretty
perspective making sure you remove the
muddiness by add a texture that’s also
very clever technique this I learned way
back when I was working on magazine and
I have you create PO for matters in the
print and some of the Python is not that
good and this is one way we have to do
that to make the picture printable this
is all tag very cool old tag we talked
about at least twenty years ago all tax
but now today I don’t think people face
this kind problem anymore the stands are
so good yeah right but it’s good it’s
good in case that someone took a picture
of a dark room with the old cellphone
and you need to fix it this is good to
have it behind your head it’s like oh
yeah just put a texture on top of it you
renewed the pixels with clean pixels and
you could print it better that’s that’s
something I never thought about but it’s
a very good tip for sure
and people don’t used is a muscle long
okay so um a lot of people ask me what’s
the different between being a
photographer and
a we touch her right now right pretty
straight for being a photographer you
always don’t for the good stuff you look
for a good composition you look for your
site you’ll of course clean backgrounds
right yeah and there’s like yes that’s
what being photons about look for good
stuff well when when you have good stuff
to work with
oh that’s a lot good stuff out there
you’ll find something the full stoppers
ice that’s what we all should have right
right even even in a dumpster you can
find the right lighting the right angle
the right things a highlight that look
great yes so but meaning uh if you’d
stop post-processing you have to look
for the bad stuff what do you fix yes
what to be bad let’s I’m like forget
about composition air lighting error you
have a busy and distracting background
yep color correction like white bars off
whatever yes
building I’ve got my saw crooked or
shifted ah yes body shape sometimes it’s
not because they’re they’re bigger or
whatever it just when you pull lens
distortion yeah destruction you’ll fix
that and ever expose highlight right
mm-hmm
and there’s no detail in the shadows of
pitch black like a pretty right out and
also the framing is over you to crop
yeah those kind of stuff so yes all
these things will help make the photos
yeah make a bad picture or less good
picture become good pictures that’s what
we have or an amazing picture
so let’s couple example here okay all
right this is another coup a photo shoot
we did in Florence Italy there’s this
one the church at the top of mountains
okay you’re right mom my goal was to
able to capture more charges with the
couple walking like a story time but
okay you look it down here this is the
steps so this is yeah that’s a tough one
okay yep I took back that I do not only
bring it because
in order for my wish network everywhere
has to either be on 90 millimeters from
far away to get a straight line of the
building and yes yeah all right yes I
can defy gravity and flow the sky and go
back yeah very far back yeah you have to
be very far back with a really long
focal length to get the column straight
there’s no way I can do that right this
is they already jump already so I’m like
efforts there and having I got 24
millimeters this is wider singing again
oh you’re just stairs too so you have to
actually go back and fly up – you can’t
just go back because this steps down
okay gotcha gotcha gotcha so that’s a
difficult situation so it’s not
situation so back to the finding the
best of project is that right
composition air offices all that here
yes building architecture lie you know
it’s all messed up yep and overexposed
high-level good address this is like me
yeah doing day so yeah three but we
already did know that that’s that’s why
we tell a couple can you look back where
the Sun is so at least it light the
highlights of my faith in the shadows
back here so at least that’s correct
right yes
imagine if they keep walking that way
right the pay will be dark yes yes so
yeah bring this back home this is part
one of a good image in this area well
right I imagine so a little bit going
here and there and then I’ve got it back
to like this wow that is so so different
it looks amazing you you turn the
previous picture into this yeah that’s
that’s really good so on the line is say
your right is all fix yes and the
framing is just nailed it
Wow wait so how did you do that like
what what tools did you have to use to
make all that happen well first thing
first why here because I have enough
information right here so I’m going to
raw converter you know you fix all the
lines right I did not know that
so you shift
the picture the way basically ship every
single pixel according to the line oh
wow I do that a straight line that’s
pretty cool
that’s something that’s the most
difficult thing on this is basically
fixing that other than the exposure all
that and the color talk and a little
texture on top of it make it look a bit
yes yeah like if you didn’t tell me at
those these two were the same picture I
would have never believed you I would
say yeah the same day but different lens
different perspective totally young
people geometry obviously that I’m a
baffle topper well try dude this I went
you’ve to climb one this picture right
you ready have a situation right here
where the step is and there’s no way you
get in camera correctly right that was
are you gonna do you can’t there’s
nothing you can do you have to get drone
to fly back well now you can’t with a
job yes plus you don’t want to carry you
don’t want to carry a drone this is more
equipment mm-hmm but if you have to if
you know how do you post-processing and
you know what you can do with it then
your vision is totally different when
you come to this remember you asked me
over how I avoid all this shooting in a
public area and you know all its
problems now let’s say if the client
want this and they want mes all like
that they will have that you know that
they’re yeah that makes when you’re
walking around Italy your carry a
suitcase Keys a stuffing yeah right here
a lot of stuff yes and you don’t faint
the police there will like try to hey
how come is Chinese guy in Italy carry
all this time a man what is he doing
here
or what is in these locations all right
they’ll be curious so you’re not a
photographer care about what gear to use
to capture that vision they never
understand the country’s culture the law
and the we all deal right can you even
fly a drone in the area or you get like
flags or put in a jail or arrest it
right away
you
you don’t even know that’s why I like
not that I’m trying to sell
post-processing but right it helps I
mean but look at that this is like a
million bucks and you you can you can’t
easily get this without post-processing
you cannot get it without
post-processing Isis
you gotta wait for the at least yep the
way for the way bond of the Sun comes in
yeah and who me and the cloud is kind of
diffused in the sunlight you know you
got away the natural natural world do
the thing but that never really happened
right I mean this is the UM the most
amazing before-and-after I’ve seen and
like how long did it take you to post
process this wasn’t that long I mean
only we’ve been doing straight up the
line fix exposure highlight and make a
subsonic vacuum where the tuxedos dark
because what my straight line all this
guy thing is gone because it’s rate up
is that free of oh yeah and I just have
to do a little color and shopton and
apart tension is it that’s amazing you
have to understand where this pictures
potential is for in the first place yeah
we normally just junk this picture right
you know I would yeah we totally change
it but that’s we’re actually doing this
photo shoot that’s what I wrote is
sometimes I have to capture just to get
the raw material so when I guess yes I
could work with it it’s coming you gonna
market you by yourself yeah you have to
grow it first yeah but when you took
this picture did you already have the
vision of how you’re gonna post process
it yes cuz I know I can fix the line
nice I know I’ve seen the I know I could
get back this frame for sure
wow that’s impressive
I guess what’s he doing enough you you
understand what you can and cannot do
yeah but system one that doesn’t retouch
at all like I would never have imagined
just because that’s why there’s only
four ball shooting and getting right
camera but you’re in crucial situations
sometimes you just have to do things
like this and knowing about the
potential of post-processing even though
you don’t do it yourself but you know it
it helped you to create because that’s
very point to be honest Fattah be it’s
not just about setting up some time is
no spontaneous moment that you know you
never enacted and then you just have
this and if you know fully from
pre-production in post-production
you know how everything goes together
right grab those pictures you lose good
opportunities for sure I can see now
that if I if I was in this situation I
would want to get this shot because then
I could convert it to something that you
have as a reasonably day people have a
Joel they get to get this shot easy now
I’m just fine Joe but like you said if
you want to bring it drilling and if you
could get through security right there’s
any if you go for the drone there’s like
three things whereas what you took any
photographer could take with a wide lens
and understanding of post-processing
pretty much very cool I love this this
this is one of my favorite
before-and-after photos I’ve said it
before and I’ll say it again I like it
and then it’s another story also informs
the couple wanna have a picture which
the dome is behind yep when they told me
that say sure no problem
you know it started then realize this
dome is actually have the wall up I
think like 150 stairs off a hundred and
fifty stairs like this is for 150 don’t
forward like so 150 steps but how many
levels is that like I forgot my uh okay
but it’s not hundred fifty floors let’s
just say you do not want to kill your
camera yeah okay it’s a very very very
long travel up I thought so I get in
this case I don’t bring any lighting cuz
I am NOT gonna carry all that junk just
pick out a mile walk and assistance now
they’re waiting right get up you’re
gonna shoot done right so when I’m out
there I know for a fact that a couple
one clear shot of the dome behind so I
exposure 4-perf exposures do right right
be
is deep insight is all talking but I
know my camera I know my dime dynamic
range of my camera I could bring those
back
the only daunting is the picture they
show me they don’t have those fans in
there or the big pillars come in but the
big pillar is actually not the back
pillars they’re things the big deal is
they’re sure yeah the pillar pillar
looks good actually because like it’s
part of the day but this is one of the
picture that we really really want yes
they point up in warrens or something
like that
I forgot story yeah so as promised I
have to you know deliver so right like
now I have to go to follow fans alright
okay if you look closely some some of
those I have basically I did not use
comb I actually chew off did you not
have the closed ring you all back I pink
collar back into it so seamless it
blends so well you wouldn’t I my
builders ever again I would never do
that again
it takes me if I’m memory is 67 hour for
just one image Wow but what I’m
impressed even more is how you brought
back the shadow
I guess that’s easy for you because you
know your camera but the shadow is
really impressive to me that you brought
that all that detail with the shadows so
it’s all there the end result is amazing
I’m sure the couple loves this photo oh
they love it they better love it
Talia this is one of those I remember or
so ty other the invasion was so tired as
I have a go in zooming in like 230
percent does ping ping ping ping ping
ping ping
that’s amazing suppose that the break-up
is so close there’s no way I can use
Chrome stamp but not to actually Chrome
because it doesn’t work it doesn’t know
natural so and I had to drive it the
clone tool sometimes works sometimes
very difficult and I could see
situations for other bricks are so close
together you want them the right angle
the right alignment it’s hard so at some
point in some situations doesn’t matter
how advanced all the tools are you have
to go back all right
looks great and then so then on one
which is one story shotgun and shooting
those tore you go into like a church is
a Torah you’re not supposed to fall grab
inside this is actually a church or
church and yeah it will be cool that if
they were staying there like pretend
they’re getting married right yeah so I
just don’t stand there basically grab
the shot but then you see how they have
this thing blocking and in fact yes yeah
Mary there definitely is something
blocking them right because I want to
create a story yeah and the lines are
gone I try to capture cos this feeling
looks really amazing
I wanna capture the 24 millimeter or
four wheel yeah capture that then let’s
come get as much as I can and then just
freed up Wow and we put the pile and all
that so that looks like they’re actually
getting married in church like that oh
and then the color the color gradient
just gives it really fresh food or an
actual color how it looks inside a
church oh we just bad lighting lighting
this okay I have to dispel Lighting’s
but no good choice of recreation of the
colors it looks really good all the
artifacts are gone everything is
straight and lineup looks great another
fit time I found that you have to
straight up all the October because
human I kind of enjoyed this comfortness
of straight and horizontal like yes
because that will
it was pleasing her when we look at
picture like this I know a lot of
photography and stretch yeah
to me there’s two thing I don’t like one
is I go for an oil painting like you
would never see a wide-angle feature or
no ever no ever no and the second is
with the waggle is not stable
I don’t feel the comfort or um easy to
wash pic you feel like it’s kind of you
know there’s something all about it yeah
you see something we just all level up
it just builds yes safe and it’s
comfortable it is really really safe
comfortable and nice I like it I tried a
lot of people but it has to do with the
perception of what works for them I I
would probably I agree with you a high
percent cuz I’m a engineer I’m gonna
calculate your background to you so I
love the straight lines the
perpendicular like when I design logos
and stuff those are these I look for too
but maybe other people have different
perspective maybe other photographers a
different perspective what other clients
do but I like this I talked to a field
um and they pick at that point they want
that wow effect of the Y angle because
yes wheel yes
but they fail to realize that yes you
have to serve a moment for that one time
when a person look at your picture the
second time the first time for time it
become yeah you know yeah no you don’t
have to first wow factor I mean if you
we realize a functional photo is to be
long lasting then you know what you pay
and you know what side we’ll go for yeah
and one of the ugly ones editorial type
look okay yeah
really huh the client like oh my God
look at this tub I love it can we do
something here they well I can’t we just
say no what the client right yeah even
though they look at all of it look at
all the circumcircle all the bad stuff
those things I’m just sticking out as
sore thumbs because it’s very bright and
her dress is very dark too
yep I mean when you look at the tension
of background all that it’s kind of
working with address it’s not obvious
enough yeah we do more you know so after
a little fussing around Photoshop here
and there and Wow
the trick is well I can’t really turn
the tub darker cuz that’s I mean look at
this area it’s a white tile
so rather than fixing the tub I think
mmm
how about if I expand address so I make
the dress bigger that’s pretty cool and
it’s very believable like if you showed
me before picture I would believe this
is how the dress looks so comfortable if
I can yeah and you move out the little
details like the handles and the little
candlesticks on the side or I don’t know
what it was that’s bothered me on the
lower left but it’s gone out to me it
looks great this is still distracting
but that’s know what’s part of it no I
like that I think that that gives it
some something interesting you look at
it bounces off the line there’s
curvature hole you see how it work
hurtin yes magic the whole thing cover
up even it’s by area ooh that would be
nice but that’s really more time more
time and also it doesn’t look as
believable because the lighter yeah
because yeah match get the lighting has
to be very different from the copy piece
of the background yeah yep for sure but
you did a great job I think it turned
out fantastic I mean all these examples
are really good I got a taste of how you
use color gradients how to use color how
do you do all the manipulation with the
lights and everything to get these great
pictures but let’s see a demo can you
show me how you get these results like
yeah yeah really close this cool let’s
check it out okay let me close that cuz
I don’t know how much juice my computer
has five year old computer you still a
pump okay pump awesome great let’s write
on this one okay all right play with
this one here okay um let me do Big L
here
sure yeah duplicate would be great so we
can see before and after so let’s see
let’s put everything we learn together
universe things I do I will we place a
sky that’s hot let’s do that so I go
into the UNA for what the beauty level
yes
ai sky replacement my favorite toy alien
it become a big day it’s just so much
fun to play with it I would not leave a
photo alone without having AI sky now
it’s not that you know how easy we paint
the sky right yeah so awesome what
doesn’t uh let’s see I’m curious Oh what
is what this is so good that actually
looks pretty good
hold on what what am I always at high so
if I flip the sky yeah I wasn’t brighter
don’t feel you want something brighter
yeah try it would be good you know
don’t like that one hmm it looks good
how about something even brighter okay
those are good cuz you see how the high
you have to match you can’t just with
like we’re not leaf or something it
together you see a highlight on a church
on her you guys wanna arm so you look
like something try to make it believable
well that one’s pretty good okay oh yeah
Tiburon yeah I like it this way okay
good
artistic flair to that really it’s
actually like color coin fluid charge
top it makes it yeah believe away and
not replace yeah yeah yeah and I like
how even behind all those little leaves
ai sky replacement oh yeah ass get out
here yeah that’s really really good like
if I were to do this manually I would
not even try because this is so much
blue there if I wanted to make it yellow
for example I
because there’s always gonna be some
blue artifacts but I saw what you made
it a yellow sky it also changed all all
the the blue I’m just resting all this
great whole thing gab and try to get as
much as I can I mean there’s still some
fixing around here and there but so if
I’ve been able to be good
the only if he is missing is because of
her bridal gown is too close to white
and then it got up there but that is not
easy not a problem okay but I will go
into AI and see what else you would do
here this is the AI – I’m talking about
yep it basically is pulled in more
contrast I I believe him because out the
contrast you see how the whole pale
explain it better but yeah even a dress
but not like you Thomas I don’t my desk
you know you see how it skin tones you
know what I think about it I probably
don’t want this anymore because I know
full of contrasts I could feel better
when I’m in Photoshop so I think the sky
we move we place is good enough I mean
anyway there let’s do that so we know it
needs more contrast cos the AI contrast
is looks better I hope you like a
skyline I want to Phoenix it’s pretty
good yeah yeah so going here fix
something here real quick right there so
I create a mask
yeah brush down the skies I make sure
that before brown color is black here
yep and just hang it up there we go
bringing back the details new address
cuz it was kind of I yeah that’s the
college right
so that’s good yep and I think this
picture the flash action did not sink
what I can do is a
that but I will mass it so that’s the
color is that is that the curvature for
the car so I brighten up the curve
uh-huh and this is pretty advanced stuff
so you just brighten it up with her the
the curve it is a mask all right see
okay okay so you see how I don’t do
really quick twist a mask you see how
some of those that is out
yeah the mass is not now if you want you
can always get this mass more and go
back in and you know fix it yeah if you
want but right sometimes I just go
double click on here and fader it out a
little bit yeah it’s more believable and
yeah feather always hiring a writer and
drop the capacity just attack so that
way it blends in more in this other way
I just know it looks so good it looks
very naturally very smooth – I can’t
tell yeah no it’s still good so a lot of
time but when we talk that’s how I
create a hide a shadow this yes it was
flat Wow there is hot in shadow wow
that’s so cool with lighting so not like
officials on her already
oh yeah perfect item that that
before-and-after with the highlight
shadow just blows my mind
that’s so cool I never knew you could do
that with Photoshop I always thought you
have to get flash lighting or a lighting
correct in person this is just so cool
soak so cool okay so the next thing I do
is I want to play around little with the
colors so I always use either a vibrant
no no that looks pretty good
and look at that right but there’s a
sometime you situation to push it up you
see how the color can go but I really
use it because it doesn’t look good so I
would just go by word and it looks
really good
like that yeah right blues guy the skin
just pop now the greenest okay didn’t go
away too because sometimes when you push
the green too much it looks great
well now it’s little bit the edge I’ll
fix that later but one is yellow my
address you see a problem I’m seeing –
I’ve seen blue in her dress hey exactly
so I’m gonna get us my cell is
saturation and go to blue chop it slide
chop it oh wow
what mass it out right inverse a mask
and just yep brush this paint it fresh
out the blue is gone yeah so the blue
now is highlighting in the sky and then
there’s the blue part of the
architecture but not in the dress very
good yep so that’s the blue with that’s
no so how clear and clean that is that
looks really good
now you know why same time I can’t have
different things but the
before-and-after is shocking the sky
replacement is one big Wow but then also
like the way you manipulate the lighting
is really good and to like make sure
that the contrast and the vibrations is
there but not changing the white of the
dress it’s like wow everything comes
together so well
I mean there’s Mall of the things but
they make big impacts so I want to go in
a little bit in different color and play
and see but just even more so I think
the first can do little bit so I
couldn’t why and see if there’s anything
and do I’m a pony more the dress I see
when I push the white there’s not much
white in a dress that tells me that
dress is actually gray no no Jo
Oh Brian out yeah yep because if you
touch the gray now you affect the dress
more than when you were triangle I don’t
want to touch it equate in color it just
kind of mess it up even more so I
probably pregnant just attack that but
at the same time because there’s so many
great in his photo I have the massive
inverse mask and they’re painted again
so these are the done thing going on oh
yeah only the dress very cool looks
really good right or portraiture is two
thing one is the skintone second is the
dress yeah I buy a dress using selective
colors that way imagine you might don’t
do this okay
I go go for a curb and just raise it up
do I lose details
oh yeah times yeah I kept add it ha ha
we moved more flash effect to it you
know like when you try to brighten the
subject everything else is dark I’ve
always always thought how do people do
that but sometimes I can’t even create
that with lighting because light spills
but this you get you make her pop with
the exposure but you control it so it
doesn’t flash control in this yeah yeah
where’s with flash you can’t you can’t
control that unless you have like a
snoot
but even snoot you have like light we’d
light cut-offs here there it just
doesn’t really work
let’s play a game here do you think the
green actually effect by the green or
the yellow all the trees the the trees I
tell you that is I can only affect the
trees in yellow not green okay how much
there’s is not that we wanna kick it
okay yellow look at that’s maturity
yellow there well I guess I guess I do
I realize there is some yellows it’s
over you know how that’s how every
dreamy few of the yellow so look at this
yeah
if I’m in yellow here and I – yellow see
that’s what I get
yes see it yep yeah yes you want to go
about that time I love you can
but yes this case because there’s a lot
of sunlight on her and she’s vibrant if
I my trees become more adult that
doesn’t mean ya know I like the vibrate
I like the vibrant green I think it okay
yeah this goes well and I’m my talking
to Scott just attack and wow that looks
so good
one more thing let me do one more in the
yellow you know what to get you okay Wow
Wow nice result one more thing because
way now I you can see that I separated
adjust some of the colors differently
right yep yep so I’ll do a contour ship
god
yi so I have a full layer with all that
just get on top I mean under okay
wait how do you make a layer with every
ctrl alt shift E in map it should be
control option shift e okay interesting
before cuticle it basically makes mix
one layer that merges everything below
it yeah so in here and I go into the
camera wall filters but this is a JPEG
it doesn’t matter it’s a filter it
basically apply what all a camera raw
stuff to whatever format yet cuz it’s
just so silly you just manipulate the
pixels so I want you to fix the skin
kids he’s not going here only in here
has orange no easy so I go into
luminosity of orange and I’m on a
brighter her skin a little bit so you
know so you only touch your skin you
don’t even need to mask the skin if
there’s kids orange oh that’s so cool so
that’s there so you brighten up a little
bit more yeah some type of just small
sweater added together equate a lot oh
yeah I can see that actually I was a big
thing but the small little details and
the ball just doesn’t here do you want
chuckling because they shot me he has
masks ooh so the white area is where is
gonna be get shot in and not the black
oh wow can we move something wow that’s
so cool I never knew you can do that
it’s in lightroom – i won’t have the
same thing same features
now debate how you want to take it we
can take it we really like fairy tale
probably two to two hundred but
definitely thing with vibrance is once
you play with it you can’t you can’t
really go back to like a normal purse
pect ‘iv you always want a little bit
more vibrance so like let’s pump the
vibrate up just a tad more because I
like the vibrating look but not too much
but these these these effects are
looking good
I make it more narrow right now with
that a lot of walnuts in there it kind
of feel his sons on her see yep what are
you how are you changing it so much are
you doing a color picker what I’m right
here so messy default okay okay d 4i
basic ways to call it a bit more I just
attacked yeah yeah more more and I am
seeing that I want more tension to see
see a potentially bringing more of the
GST to up so pretty little more yep dad
I bring highlight down just the 10 so
they’re back see the back of the dress
right here mm-hmm
I was burning a little too much so give
a shout out so that contrasts there and
then so these are global edits without
color
yeah because but back back in Photoshop
in the layers I need all my separation
just and I said the way the whole
picture color how I wanted it so it’s
okay only coming here with the global
added to do further fine fine I just
yes okay see now that oh now I actually
understand how you could post process
lighting it’s actually amazing you’re
controlling so much basically icons like
the lighting here how it works
even if I find the background yeah and
the dress – that was my most interesting
takeaway is like you can be taught the
lighting under general I probably want
you once this I need to chop the orange
a bit because most Asian female light is
getting more lighter yeah
oh that not too one yeah okay that’s not
yeah that’s good right there
yeah and I’m okay with this I’m more
than okay with that I think it’s really
good so one thing I can do is to bit
this is more like I wouldn’t consider
color grading yet but you know what I’m
gonna use this I am gonna use a gradient
mmm haven’t changing this too is solved
like first and see what color should I
use
wow I’m without applying show you how I
use a gradient to do colic waiting yeah
so yeah I know this that’s crazy
just a simple gradient as I affect it it
really depends on colors in the pictures
and maybe and color that you’re using do
you come out upon your fest
a message to each other right Oh
interesting
I never touched some color we laugh with
the color that is in a photo we yeah
like this one you see how that one yeah
so if I lower this ooh it would keep it
in a color in there yeah it’s a pinkish
yeah I like it
and then by going to the histogram here
lowering the black you get this Grunch
like that you get the conjurer at the
same time to color him in there
yeah Wow that’s one way I do with color
you see how to even the clown has a
little pinkish in there yeah so for a
little bit okay that’s fine
and if I want to do one more thing I say
I want to do you know the black and
white color control the
you you can tease about that like so he
does the colors of the black I will open
a viber and then bring it to say a
hundred okay later that looks really bad
when you do that why would you do that
I’m not done yet so I open a black and
white filter okay mmm okay ozzie to 20%
we need to only allow 20% of this come
out okay okay and then check it out I
could isolate each color and that’s just
using a black and white filter oh that’s
so amazing
so you you just you’re controlling the
vibrance oh you’re using a vibe we
really made a vibrant and now you can
select the colors because it’s very
vibrant and you just see how much of
that color shows through yep that’s it
that way your color would never go over
yeah and you can’t go out like my
filters this is like a super super super
bonus advanced tip like I can see it but
I cannot really encompass it enough to
really use it or I don’t know we’re at
the point where I there’s just so much
yeah yeah
in this picture it doesn’t need it it
doesn’t eat at all showing you but
nonetheless that’s really cool I never
seen anyone do that so in a way we could
call it done here but yeah as you know
me I’m gonna do one more combine a dirt
okay I am going into a tea and schemas
they are for looking like a painting
yep make it like a painting look at that
oh yeah let me create a new mass on a
sub J okay that looks really good I
probably don’t need anymore let me go
give me a wine
yeah that looks very oily now okay
perfect painting you sorry that’s what I
would not oily don’t want to all your
face okay see all the texture in there
good I just have to get her face out to
make look crystal clear yep
you’re just removing the snap art filter
and also the dress yeah a little bit
more detail so chic become and I
shouldn’t be asking you’re not using a
mouse right you you’re usually one of
those pressure sensitive so that helps
because the harder you pushed the more
effect you put right so I can control my
pressure by you know you have my brush
by the pressure that’s my meat okay so I
think that’s pretty okay so so we can
have a link to below under the equipment
you’re using what is that tablet and at
the bottom a lot of people buy expensive
tablet but I have got a cheap one bamboo
weights alcohol a bamboo yeah cool so
we’ll leave a link below with the links
to some of the good templates as well as
the simple cheap ones the bamboo that
Jeremy uses which as you can see it’s
not the tool it’s how you use the tool
that makes the art so I found a stop
here with the same image from here to
this yeah that’s pretty good angle it’s
great what are you talking about
you can submit it to a contest and win
an award I already want to all with this
[Music]
congratulations yeah well done
well deserved okay so you got any other
questions on this or no this is
fantastic this is really good I mean
you’ve taught us you taught me and all
the youtubers are watch this video a ton
of information this is the content that
is normally in your presentation that
you do at WPI you
charge $129 per person and even that one
that’s probably an hour right whereas we
gave we got like the full full-blown
version of it but we’re running close
over three hours
I used to one hour Photoshop class and
you know something like that it’s like
this yeah I mean it’s a lot to take in
but because we record it people can
watch it in a couple of times and review
it and make sure they really understand
it because everything you showed it’s
really fundamental and basic it’s not
like mind-blowing ly difficult assistant
the concept is mind blowing to someone
that hasn’t worked with digital photo
before I can see once I understand it
and I can start applying it it gives me
so much more flexibility as I take the
picture and as I added the pictures I’ve
already taken so really really good
stuff I mean this knowledge is very
valuable I don’t even think 129 at WPI
is justified it’s probably worth more
than that usually I have less than this
this is more this is great I mean very
very professional content here very
entertaining watching you talk about it
your inspiration where you came from
your history of how do you make all the
photos with your the posing technique
see then the artistic reference you use
and how you just put everything together
it’s like a combination of all that in
one lecture I mean you can go on YouTube
and find videos about oh how to use this
curve right or a video on how to use
Lebanon for but here you’re putting the
whole story together and how you edit
from the beginning of how you got
inspired to the result of how it looks
like a painting with mood and separation
of colors and execution and really nice
guy and all that so really great deal
creation on on photograph it’s more like
a football phone people duction some
concept people adduction to actual
shooting and then to post productions
and also you know presentation it’s like
a football so having a mindset knowing
where to start and where they end it
helps yes yeah exactly you summarized it
perfectly well and if you guys have any
questions please let us know in the
comments below you get ideas for future
videos let us know and let me know if
you guys are interested in getting a
copy of lunar 4 because that’s that’s
what I’m getting right after this
workshop also step bar is pretty cool
too you need to making your picture more
artistic getting that watercolor effect
or the oil painting effect really cool
I think the links below we have coupon
codes too right yeah they actually
included we get a little percentage of
that so thank you for use our link but
it’s good for you because it’s just kind
of for you guys as well so check them
out
let us know if you purchase anything and
let us know how it goes and we would
love to see your before and after shots
soon because I’m excited this can change
your digital photography to the next
level anything else you want to add
Jeremy No thank you for watching and
hopefully it’s not too low for you guys
and hope that you value that edit
definitely definitely I think they’re
gonna find a lot of value in it at least
if they don’t I did so thank you for
your time Jeremy also any other
questions about post-processing do put
in a comment and see if they would help
me together and create more video for
you guys yes definitely definitely so
subscribe to this channel if you haven’t
already please do because we plan to
have a lot of content for you guys and
we enjoy doing this so it’s fun for us
but it’s even more fun when we get your
comments or feedback so we can make
videos that’s valuable for everyone and
let us know by liking this video so that
way we know what content you guys are
liking so we can make more of that
alright well thank you so much everyone
for tuning in Thank You Jeremy for thank
you guys we will see you guys next time
have a good evening have a good night
see ya see ya good bye
[Music]
[Music]


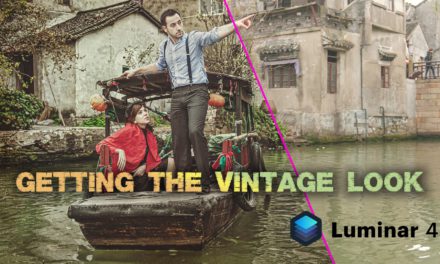


I like what you guys are up too. This sort of clever work and coverage!
Keep up the great works guys I’ve added you guys to my blogroll.